This guide is for instructors who want to record a Panopto session for Canvas using Panopto Capture, a completely web-based approach that does not require downloading and installing the Panopto recording application. Make sure to use the latest version of Google Chrome, Mozilla Firefox, or Microsoft Edge as your web browser when recording with Panopto Capture. The latest version of Google Chrome is strongly recommended for the best experience.
Note: Mac users (Catalina or later) who plan to record their screens may want to confirm that it is allowed by their system preferences using this guide, before starting the below process.
Step 1. Find and Select Panopto
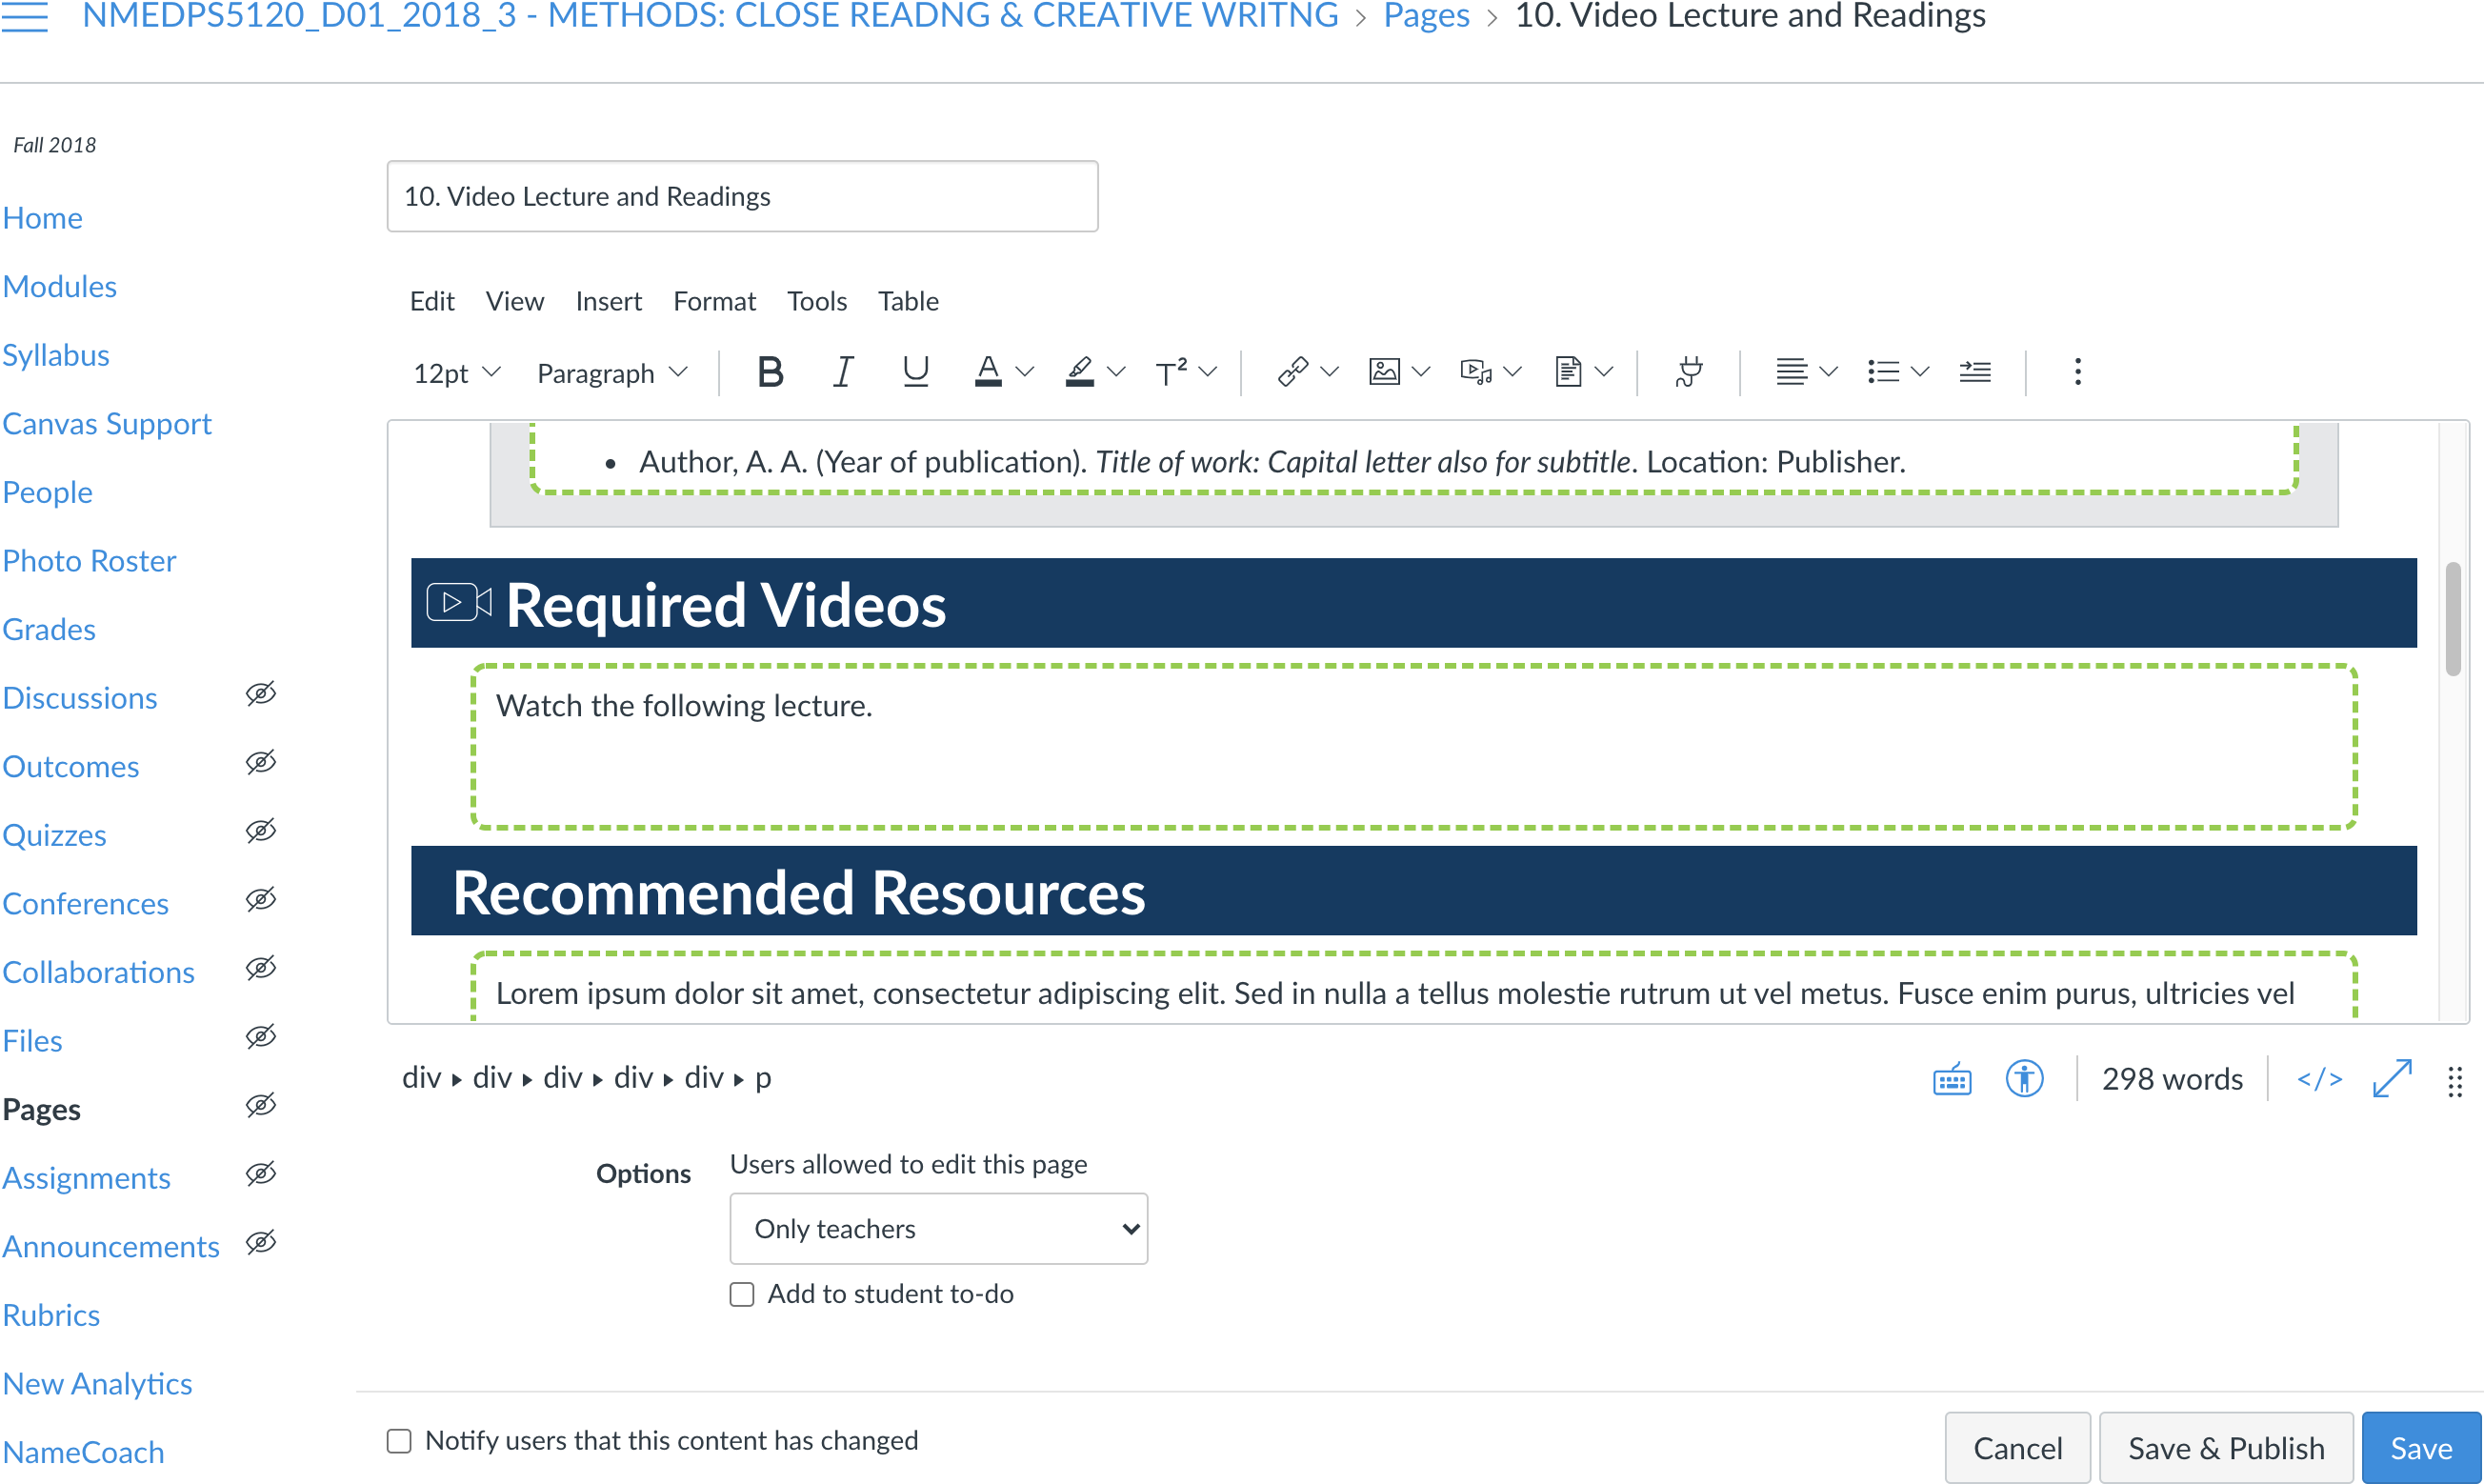
Start by going to the page where you want to use Panopto to record and insert a session (e.g. resources page, assignment, etc.). Click Edit at the top-right. You will be presented with the Rich Content Editor, which is used for editing the content of the page.
You can expand its view to better see contents being edited by clicking, holding, and dragging the dots just below the bottom-right corner.

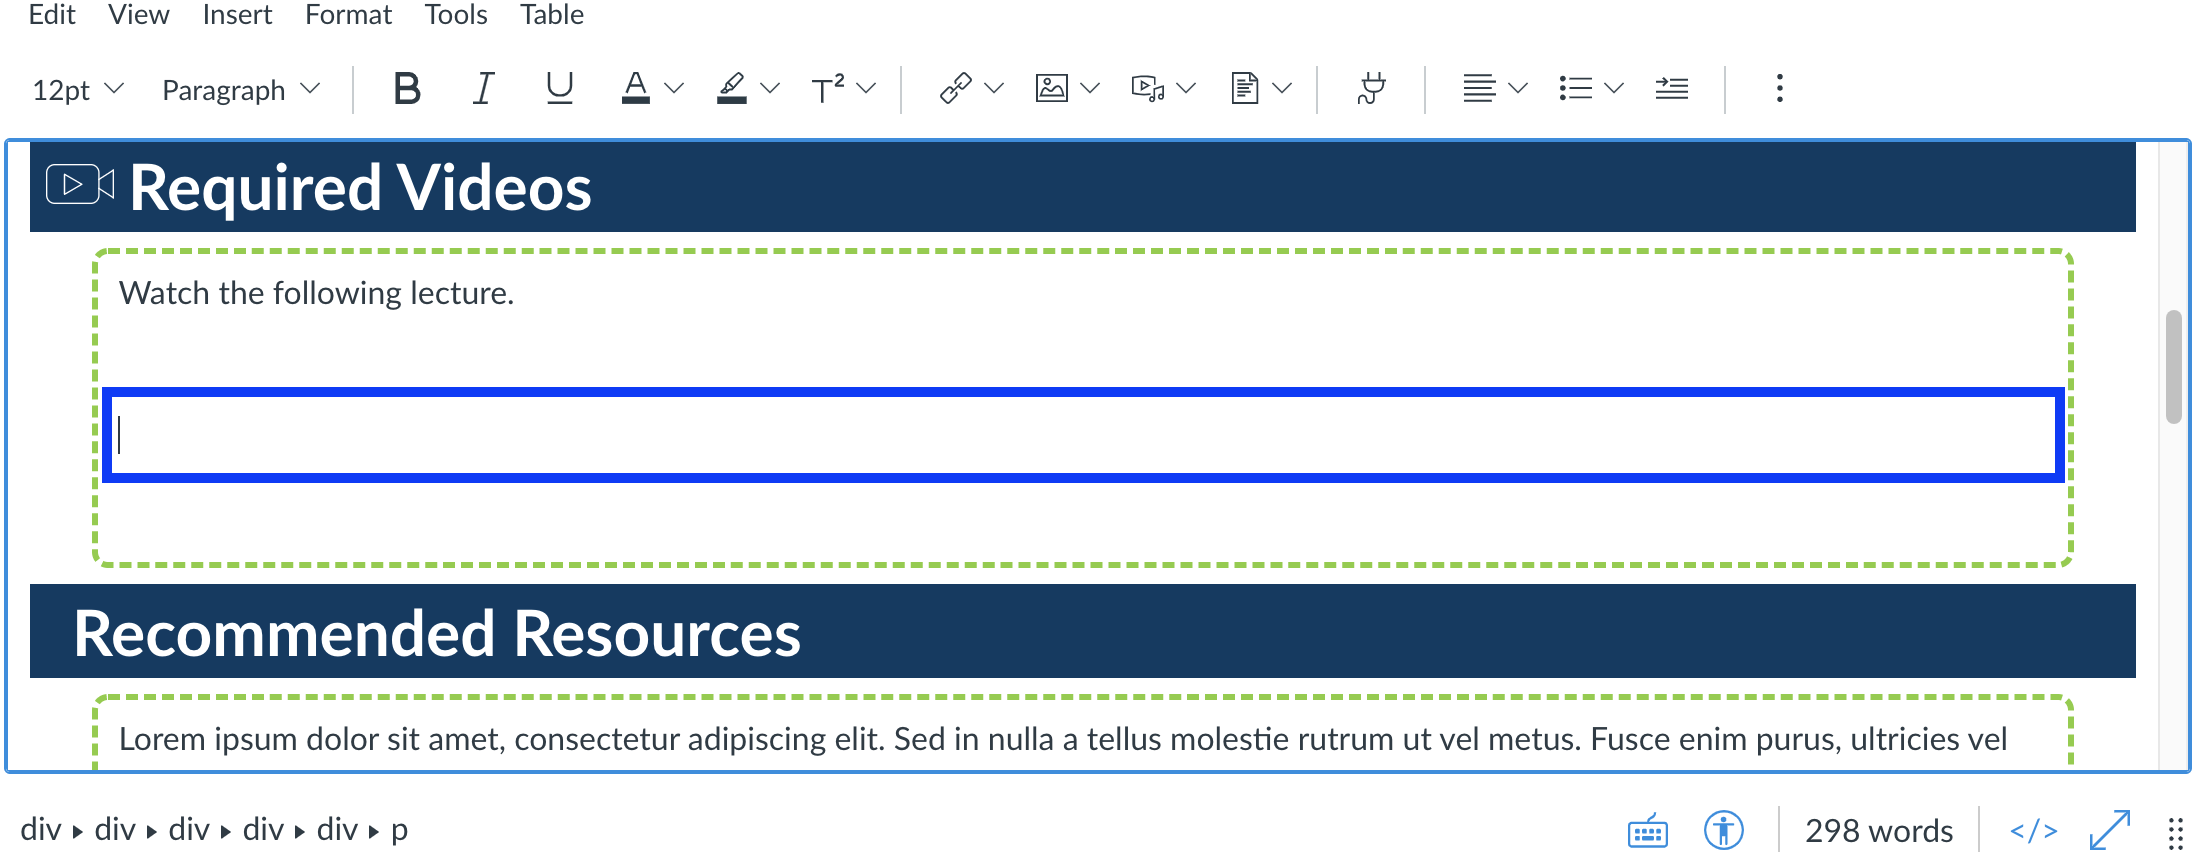
Click on the exact area where you want to insert the Panopto session that you will record. (It may be helpful to add an extra line above and below it to keep it separated from other content.)
In the editor toolbar above the text entry box, click the Apps button (which looks like an electrical plug), then select the option for Panopto, which has the green Panopto logo.

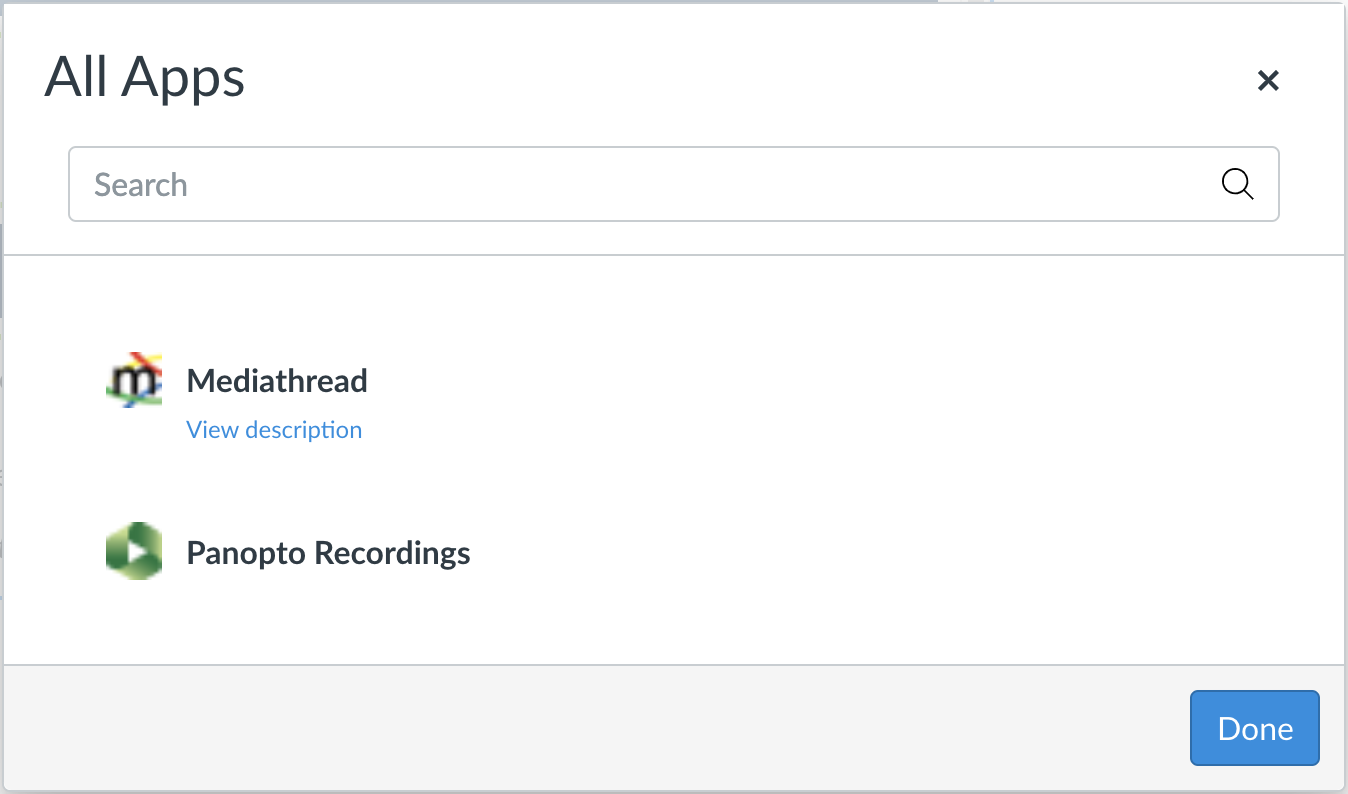
If an option for Panopto does not appear, select View All, then select the option for Panopto in the All Apps window that appears.
Step 2. Prepare to Launch Panopto Capture
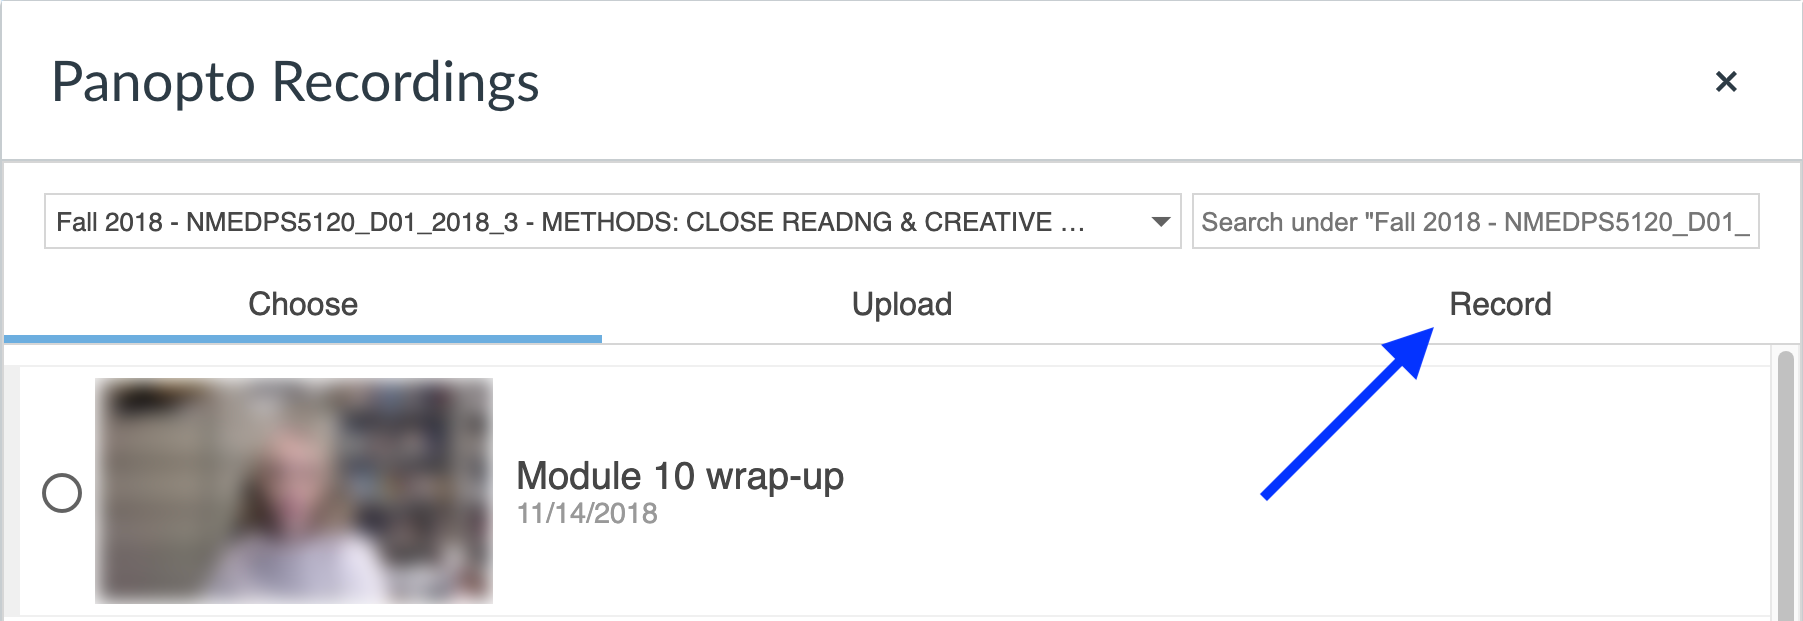
The Panopto window will appear. If prompted, sign in using your Canvas credentials. You may also have to authorize Panopto to access your Canvas account. Next, select Record on the right.
Name the session to be recorded.
Note: avoid any references to dates, weeks, or modules, as these can easily become obsolete and confusing when courses are restructured or the named Panopto session is used in other courses or contexts.

Step 3. Launch Panopto Capture
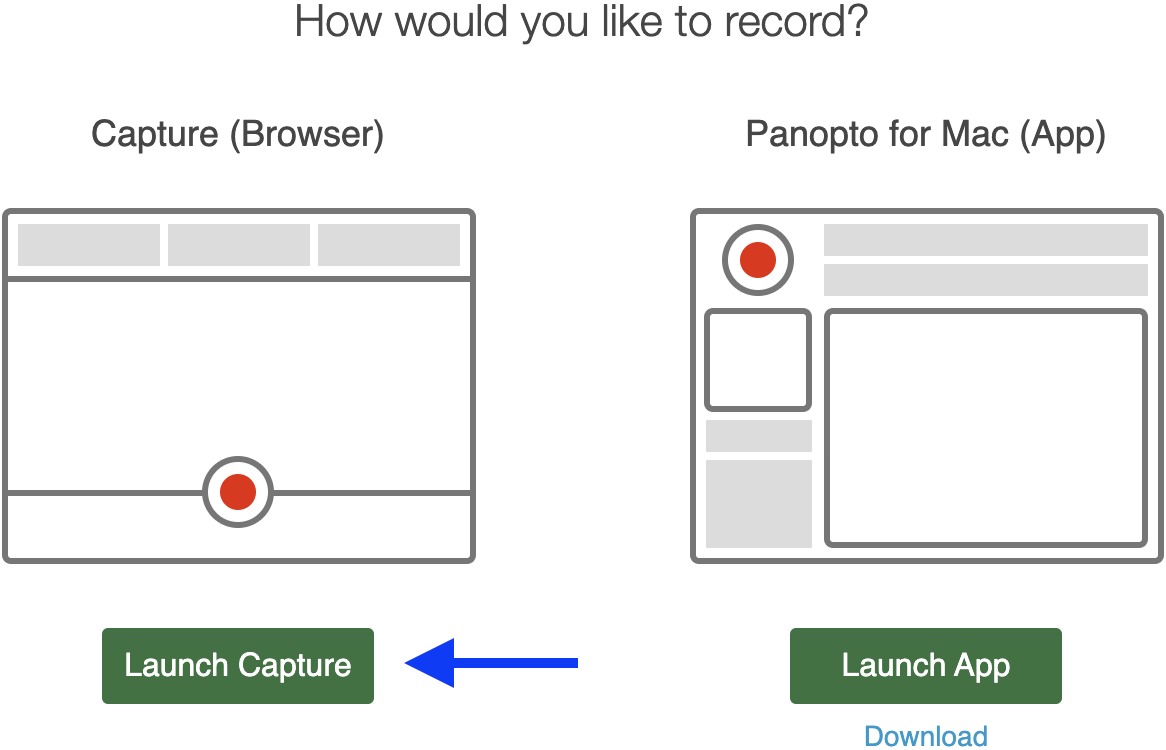
Click the Launch Capture button. This opens Panopto Capture in a new web browser tab or window.
Step 4. Prepare to Record
When you have given permission for use of your camera and microphone and Capture finishes launching, you will see a preview of your video, a microphone volume meter below it, the button to record, and some buttons for opening settings.
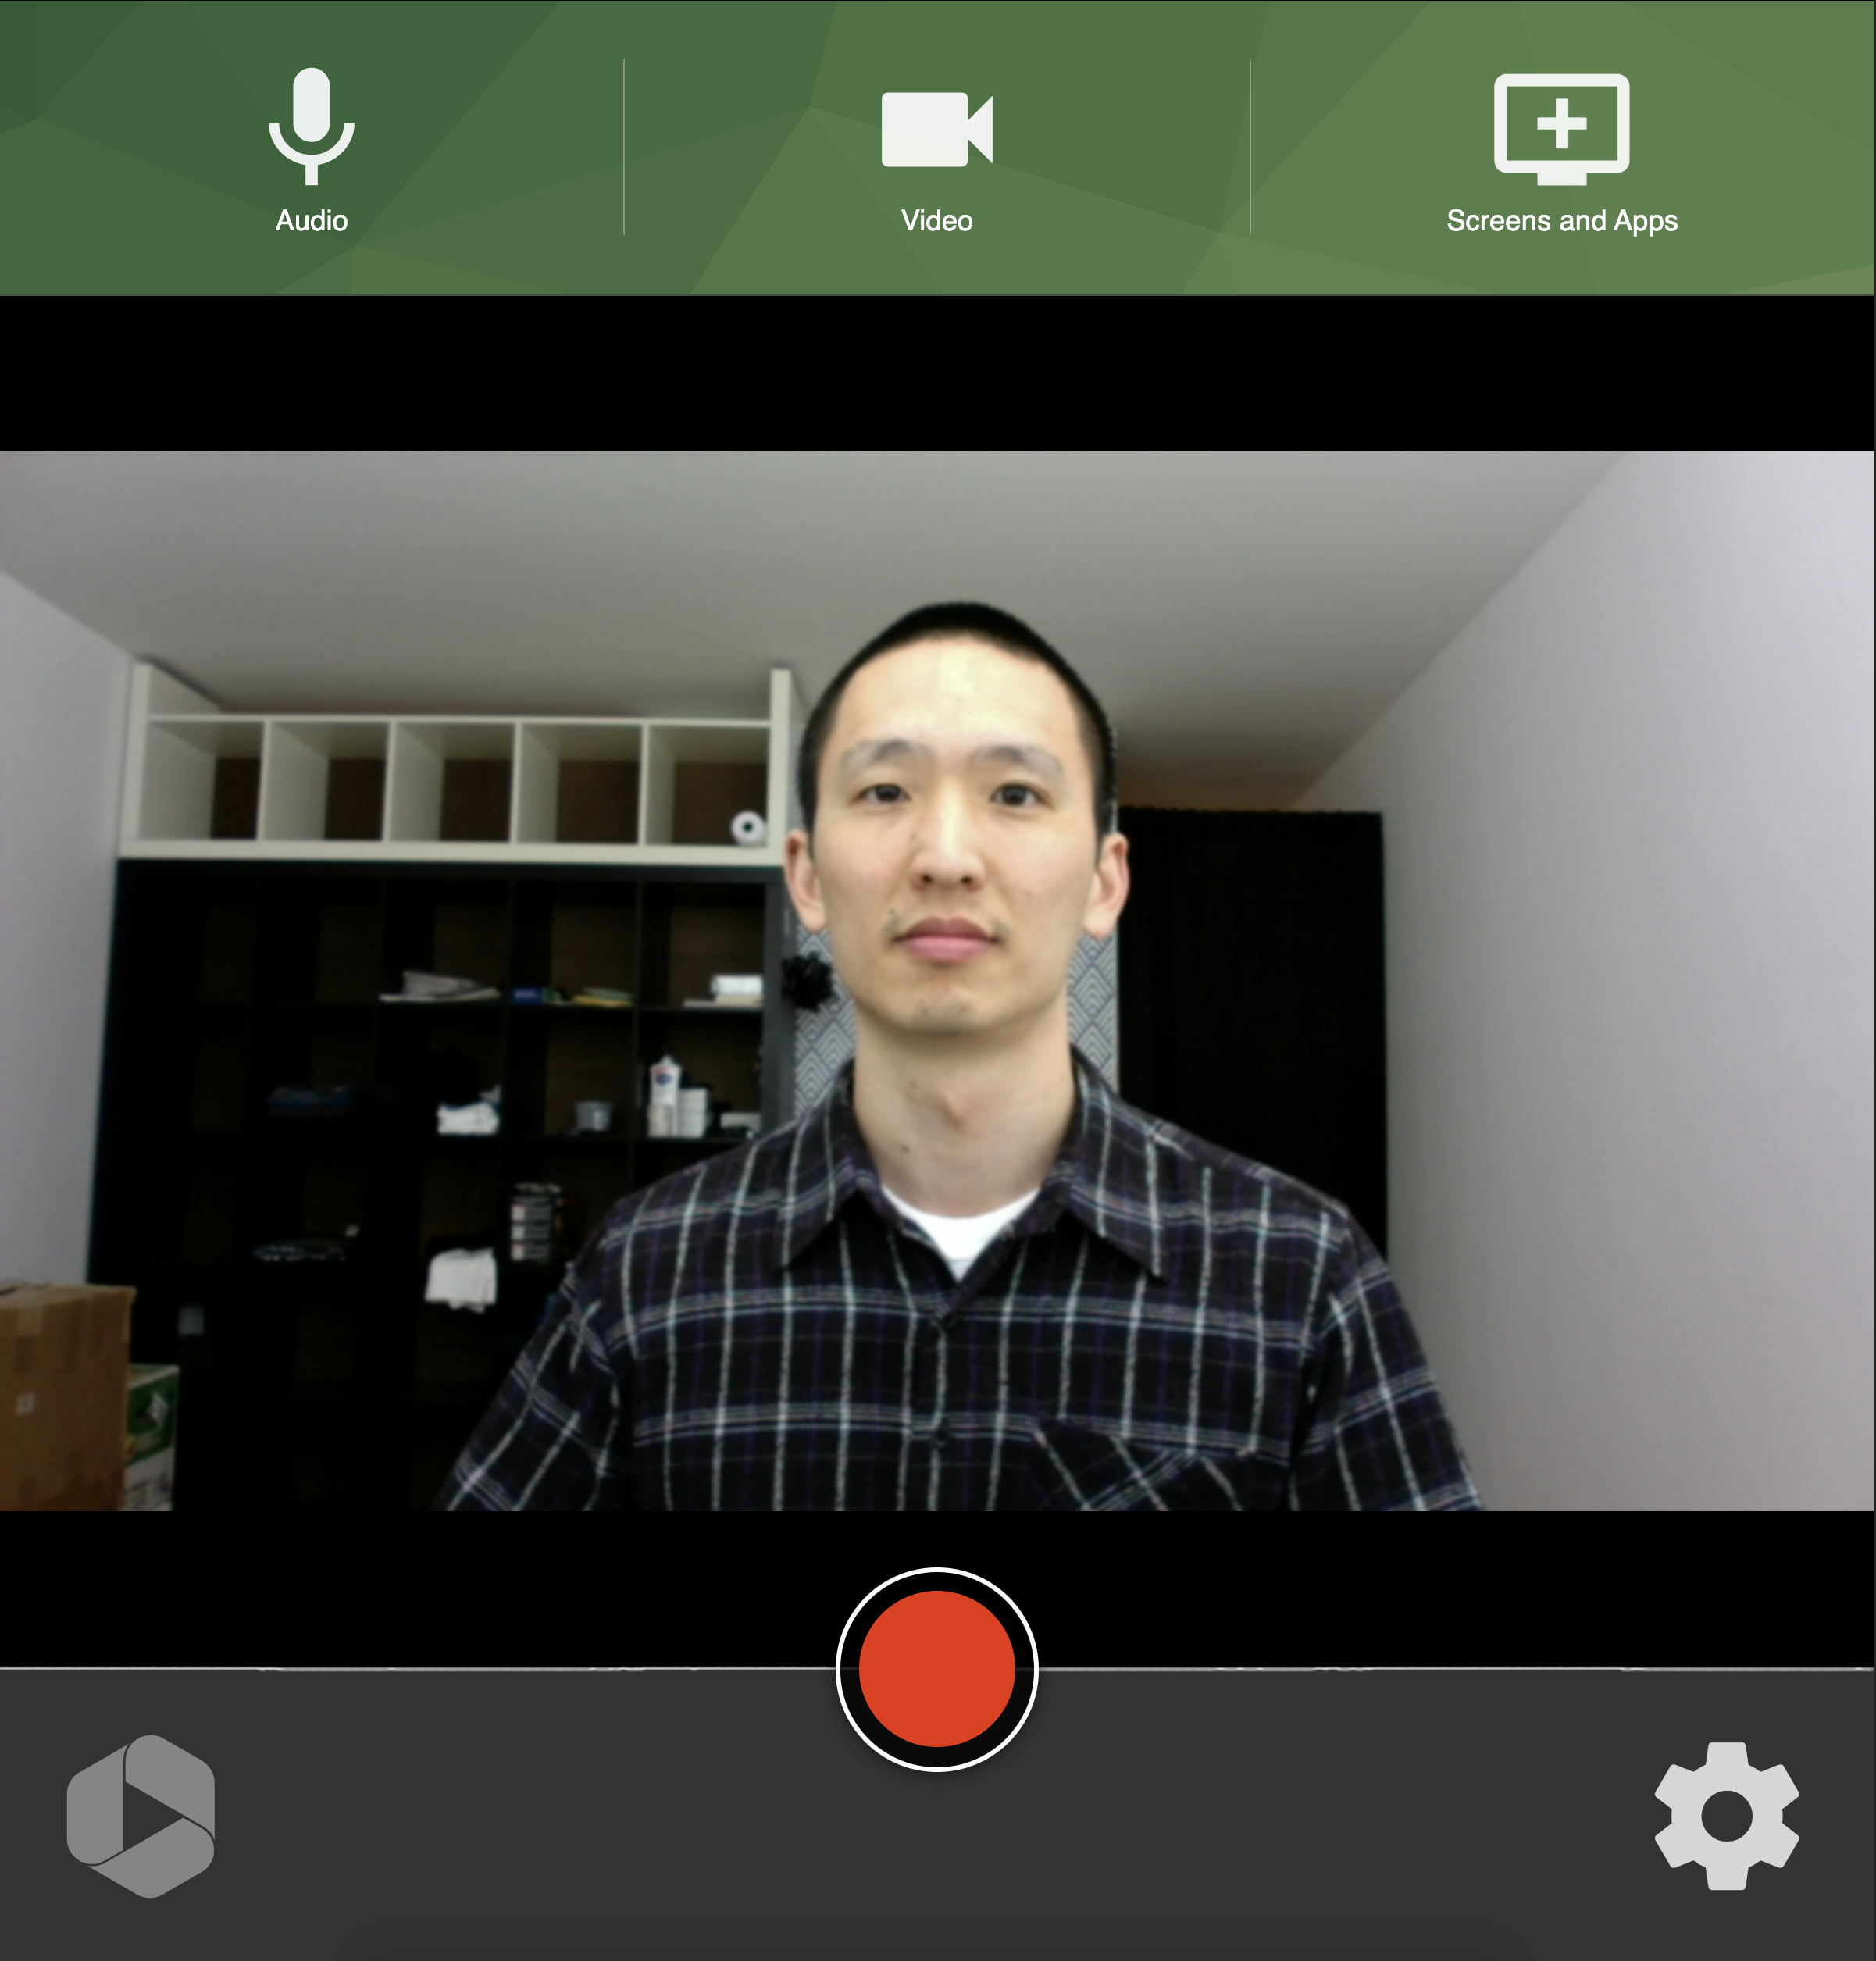
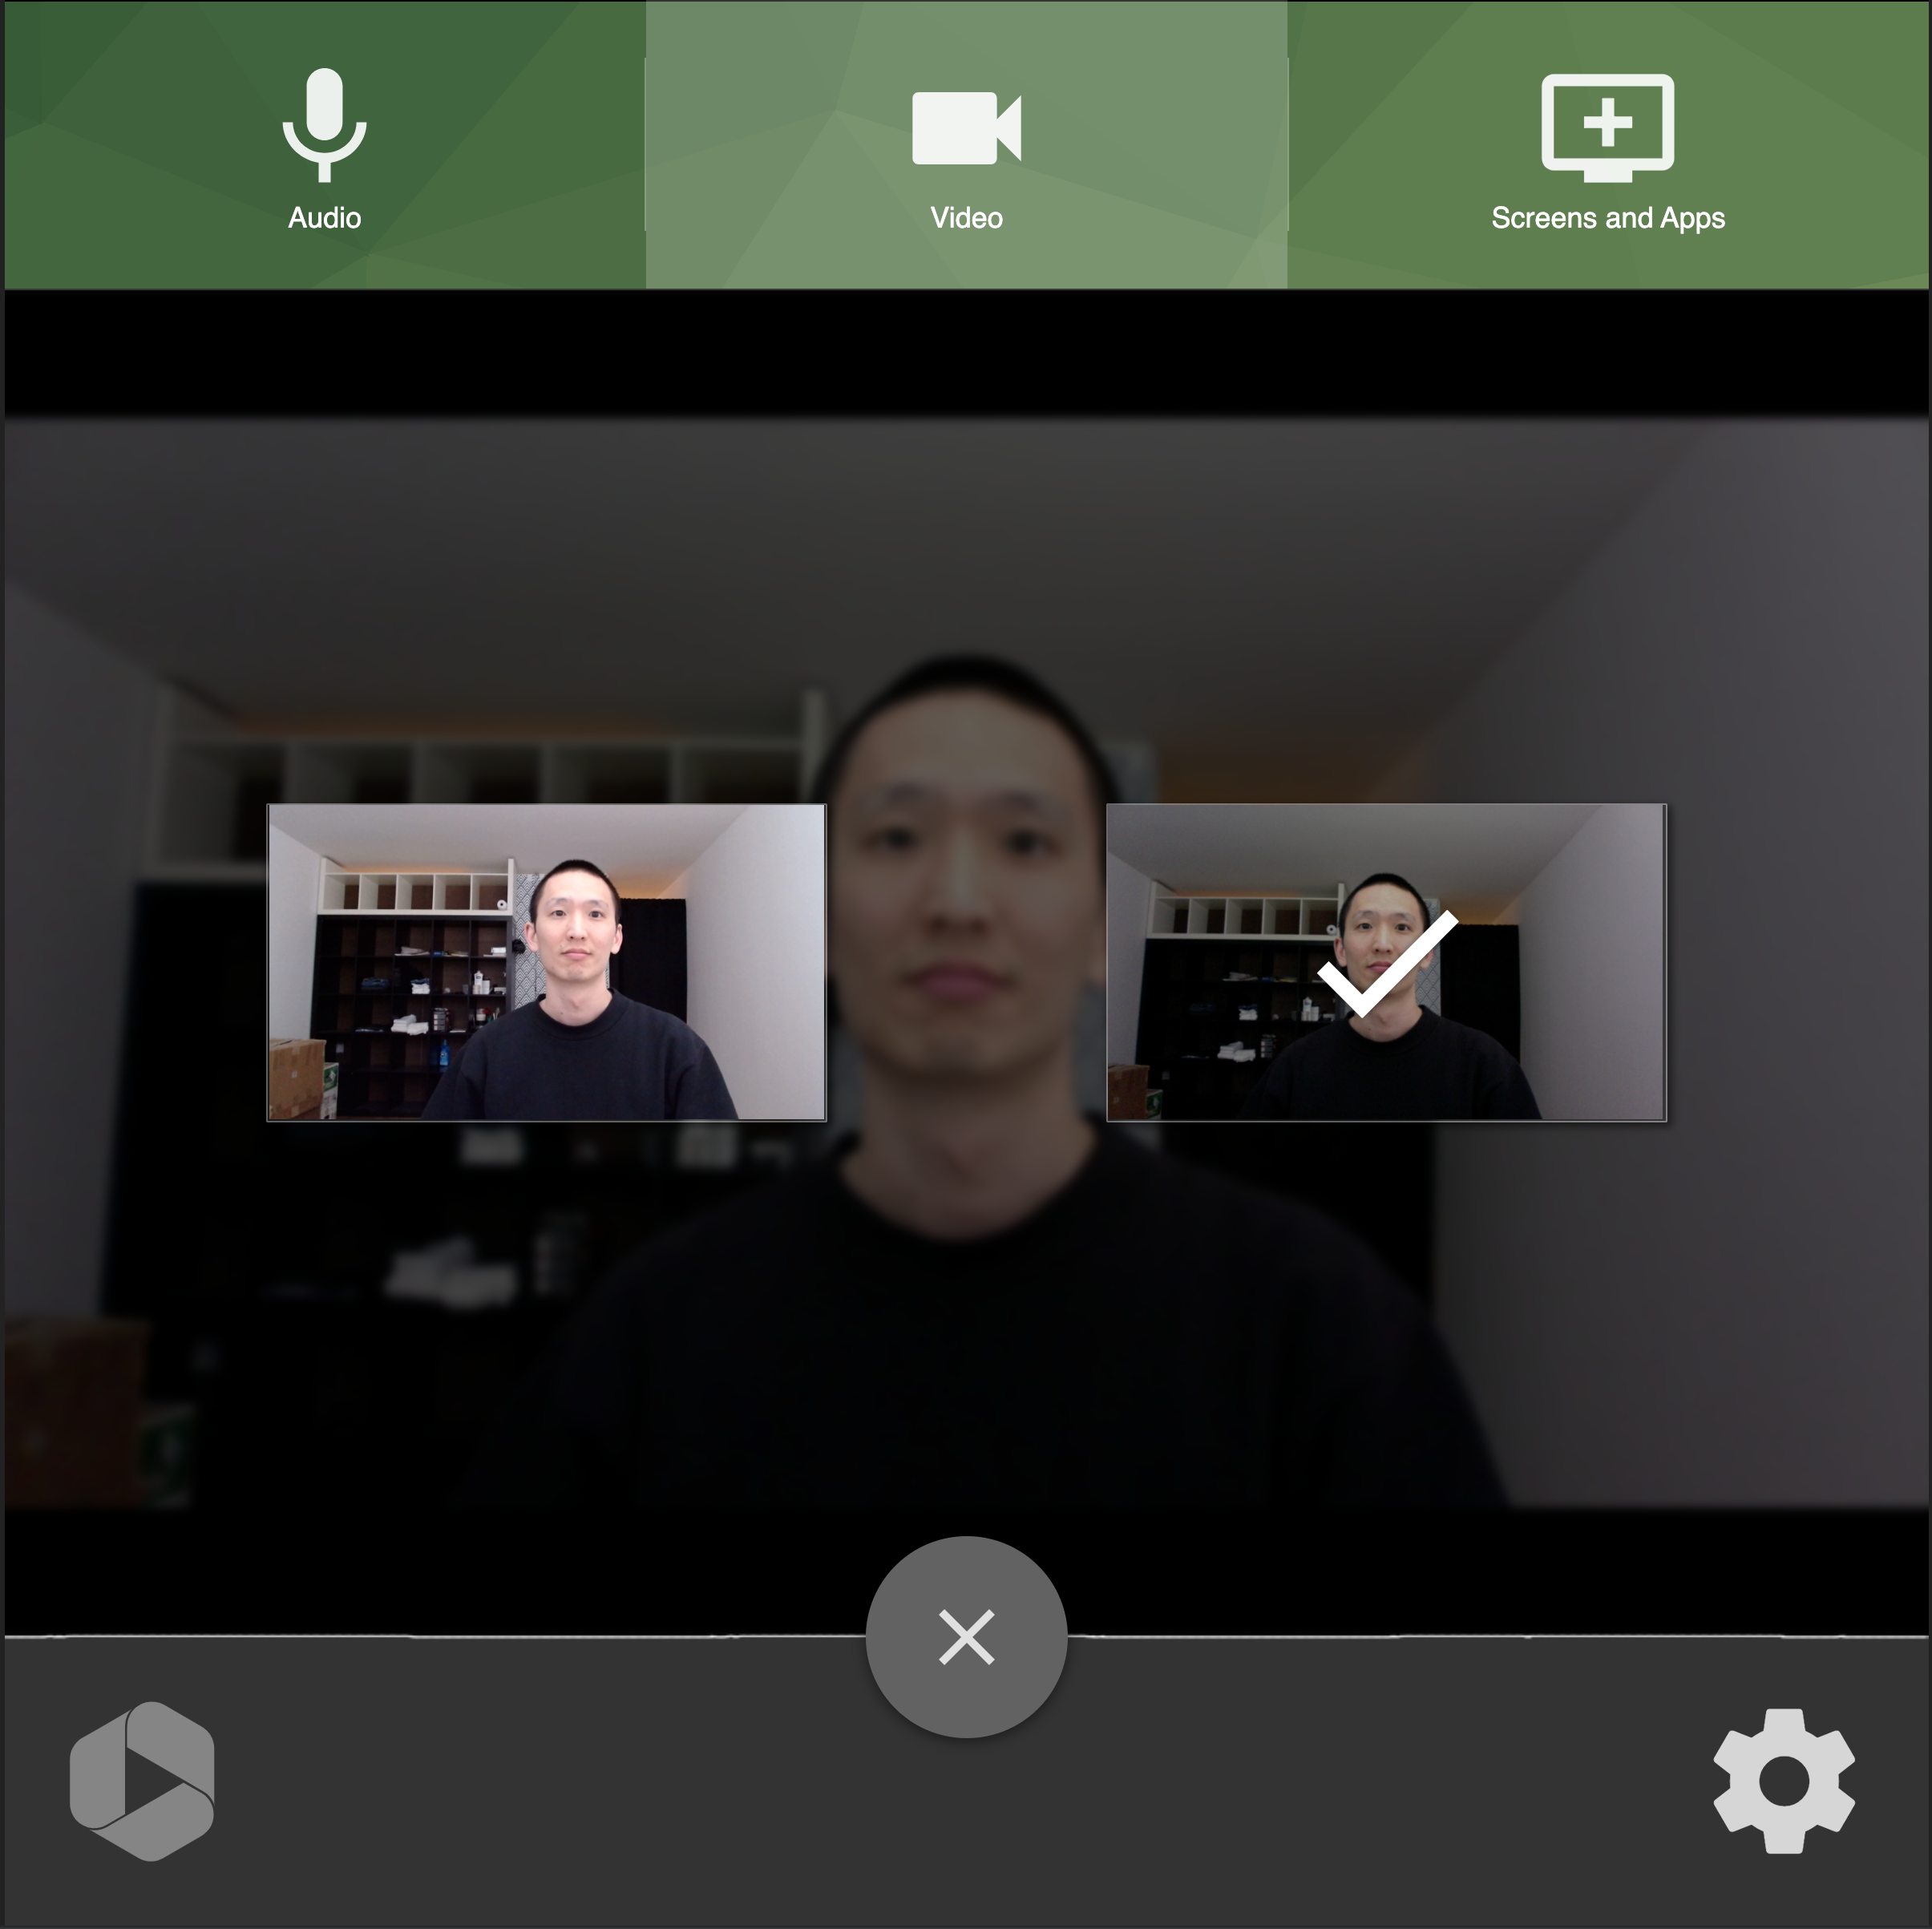
If you move your cursor over the video preview, you will see additional options.

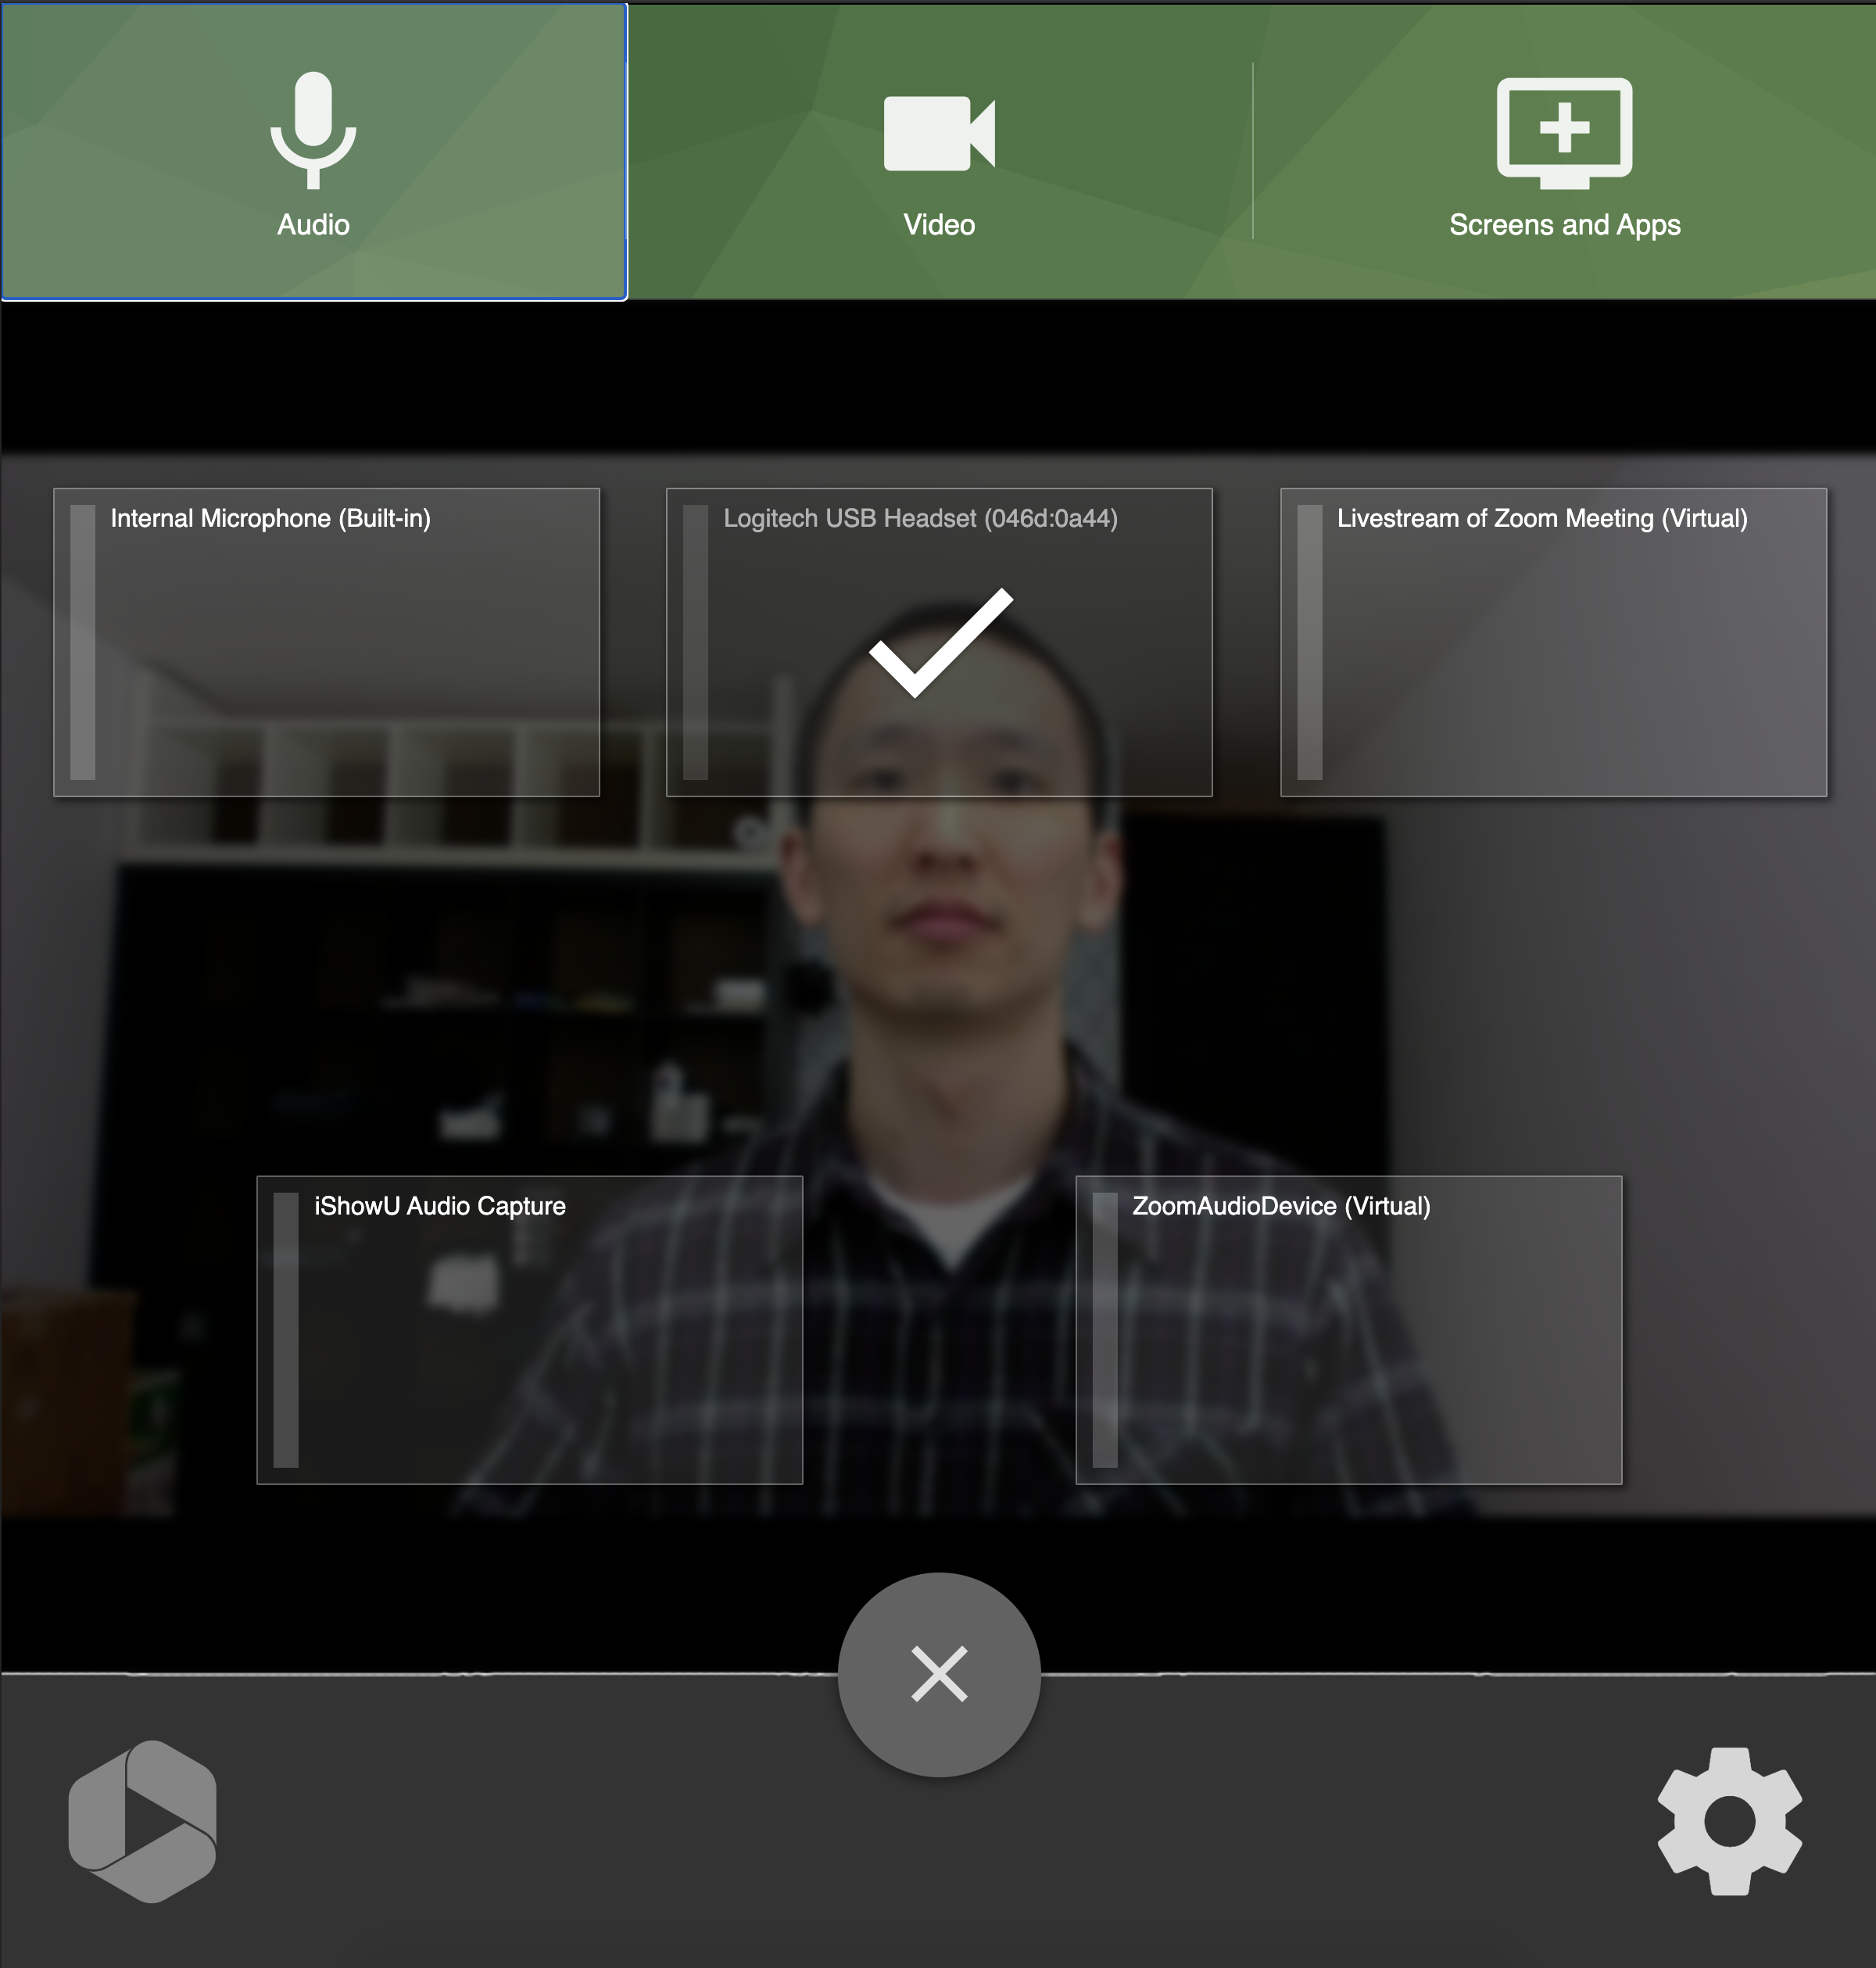
Click on Audio and choose a microphone. When one is already chosen, you can either Switch to another microphone or Add its use to the recording. When finished, click on the X near the bottom to return to the home screen, then test the microphone by speaking and confirming that the volume meter changes.
Click on Video and choose a camera. When one is already chosen, you can either Switch to another camera or Add its use to the recording. When finished, click on the X near the bottom to return to the home screen, then confirm that the camera works in the video preview.
If recording a session with only a camera, skip to Step 5.
If recording a session with a camera and a screen, slideshow presentation, application window, or Google Chrome/Microsoft Edge tab, make sure the screen, slideshow presentation (e.g. PowerPoint, Keynote), application window, or Google Chrome/Microsoft Edge tab is open and/or ready. Next, click on Screens and Apps.

Note: Mozilla Firefox users should use this guide for the Screens and Apps feature. If recording PowerPoint, follow instructions for 2. Application Capture, not 1. Screen Capture. If recording Keynote, follow instructions for 1. Screen Capture, not 2. Application Capture.
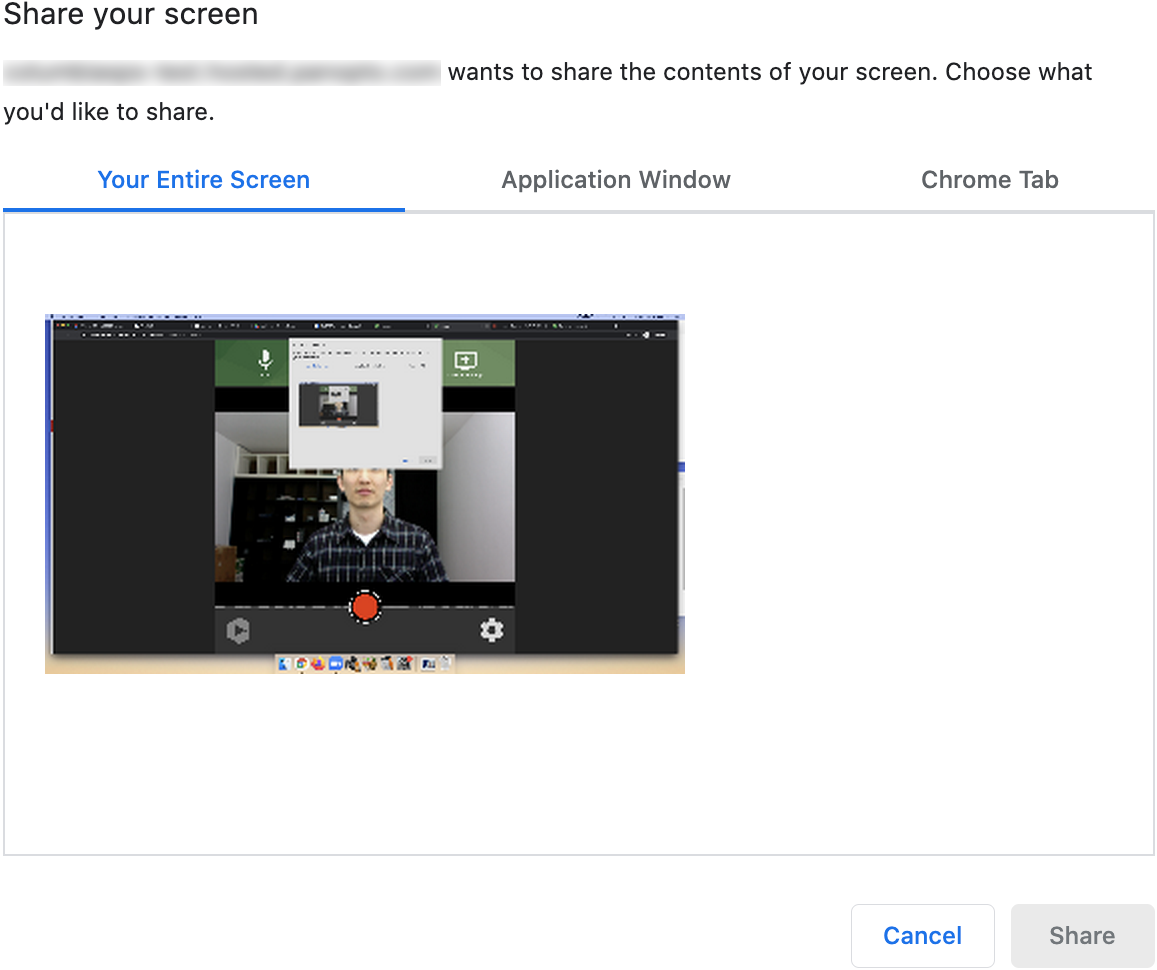
If recording an entire screen, select the screen in the Your Entire Screen section, check the box for Share audio if applicable, then click on Share.
Note: by default, sharing the audio while sharing an entire screen in Microsoft Edge and sharing a Google Chrome or Microsoft Edge tab are the only ways to share system audio when using Panopto Capture. If you need to otherwise record system audio, return to Step 3, download and install the Panopto recording application, and refer to the guides for Windows and Mac.
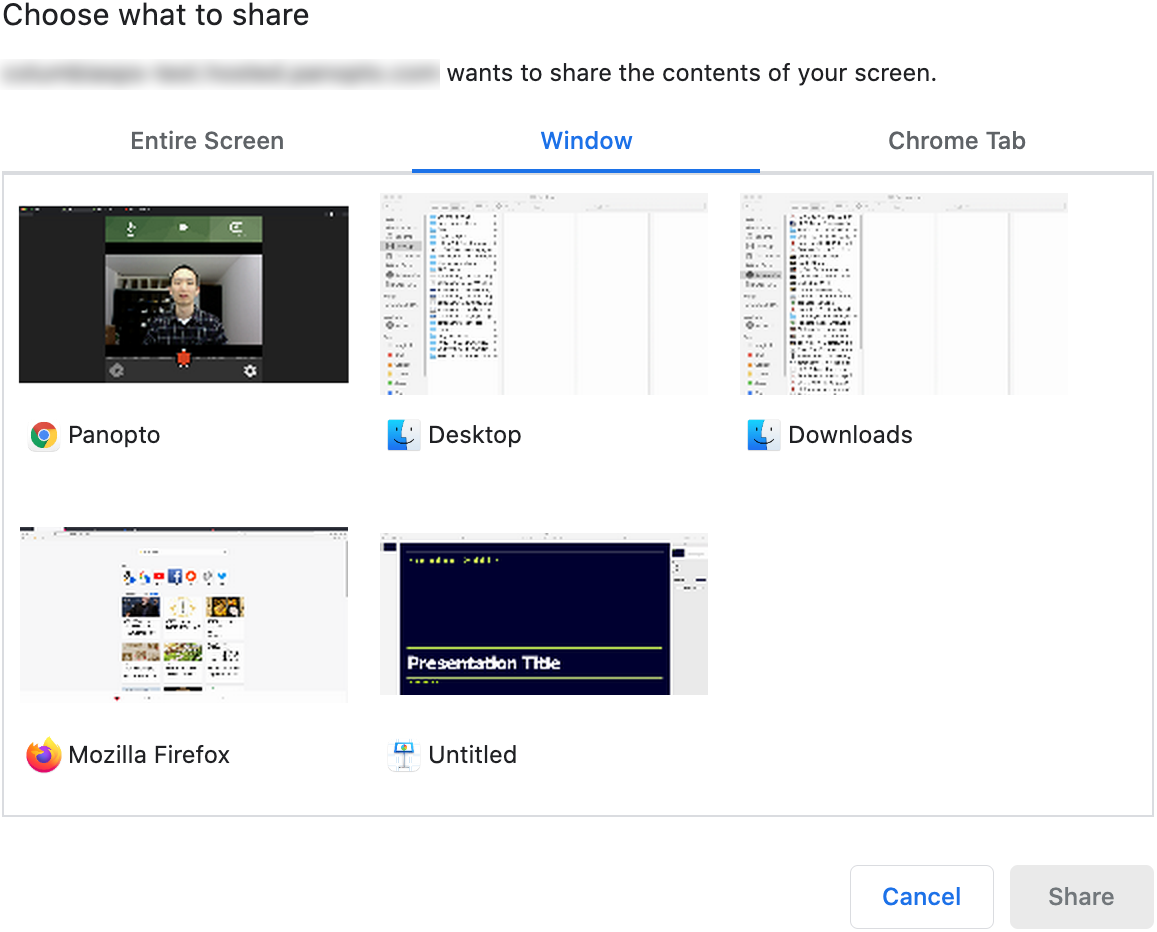
If recording an application window (e.g. PowerPoint, Keynote), select it in the Window section, then click on Share.
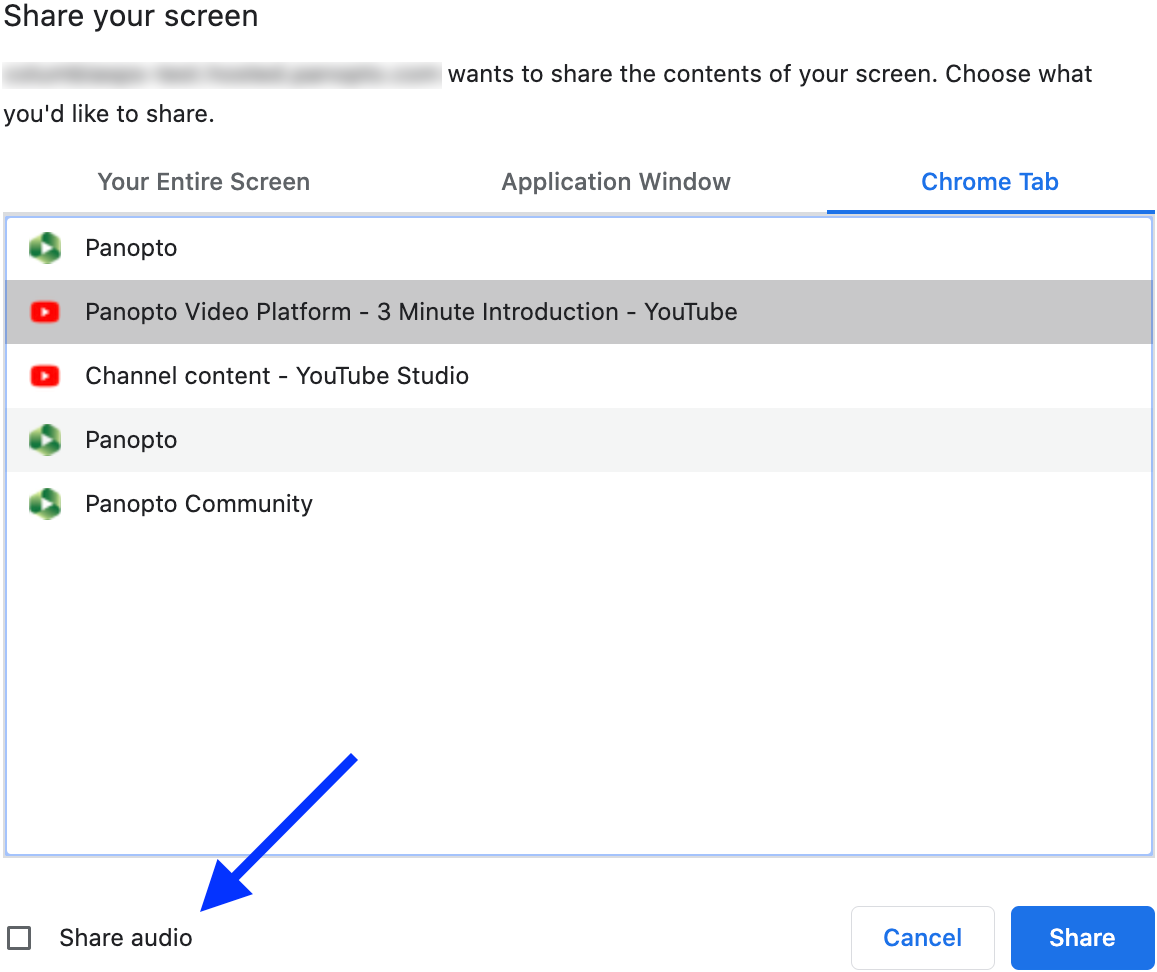
If recording a web browser tab, select it in the Chrome Tab or Microsoft Edge tab section, check the box for Share audio if applicable, and click on Share.
Note: by default, sharing the audio while sharing an entire screen in Microsoft Edge and sharing a Google Chrome or Microsoft Edge tab are the only ways to share system audio when using Panopto Capture. If you need to otherwise record system audio, return to Step 3, download and install the Panopto recording application, and refer to the guides for Windows and Mac.
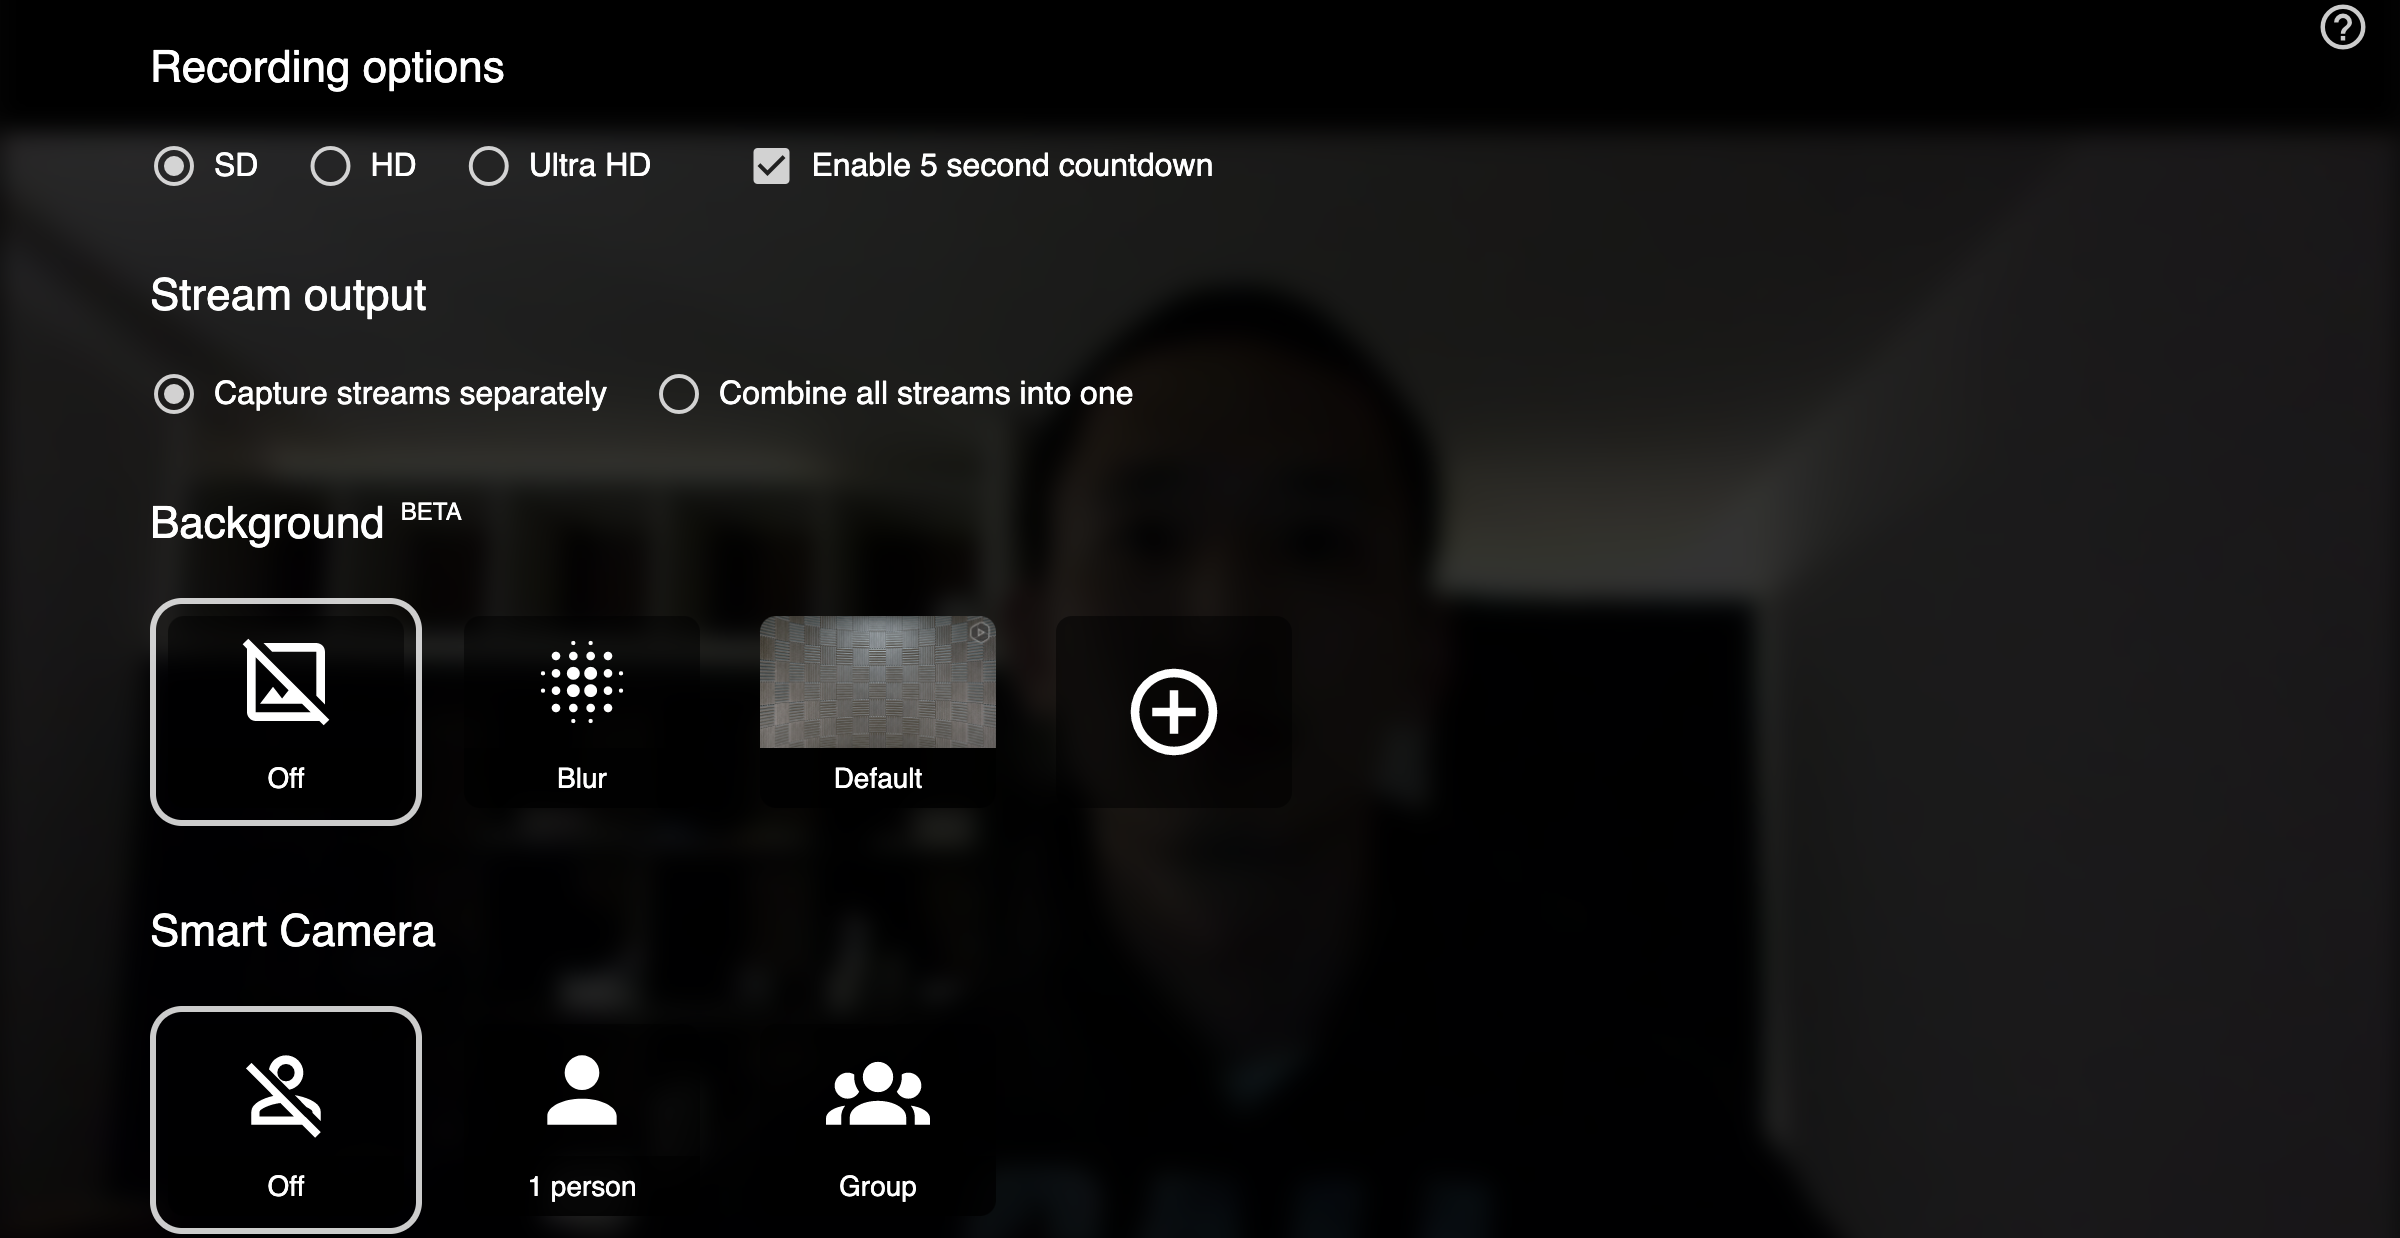
Back in the home screen, click on the gearwheel icon at the bottom-right to access more settings such as recording quality, virtual backgrounds, and the smart camera feature (useful if you will be far from the camera and moving around often). It is generally recommended to leave these settings alone.
Step 5. Record
When all settings are correct, click on the red button to record.
Though you can stop the recording and retry at any point, it is instead recommended that if you make a mistake or are interrupted while recording, pause for a few seconds, then resume or restart from an appropriate point in your presentation. This way, you can later edit your session in Panopto’s online editor and trim out unwanted parts, instead of restarting after every mishap.
If recording presentation slides, return to PowerPoint or Keynote and play your slideshow when you need.
If recording a screen, hide the web browser tab/window containing Panopto Capture, then start your presentation.
Step 6. Stop Recording
When you are finished presenting, click on the red button to stop.
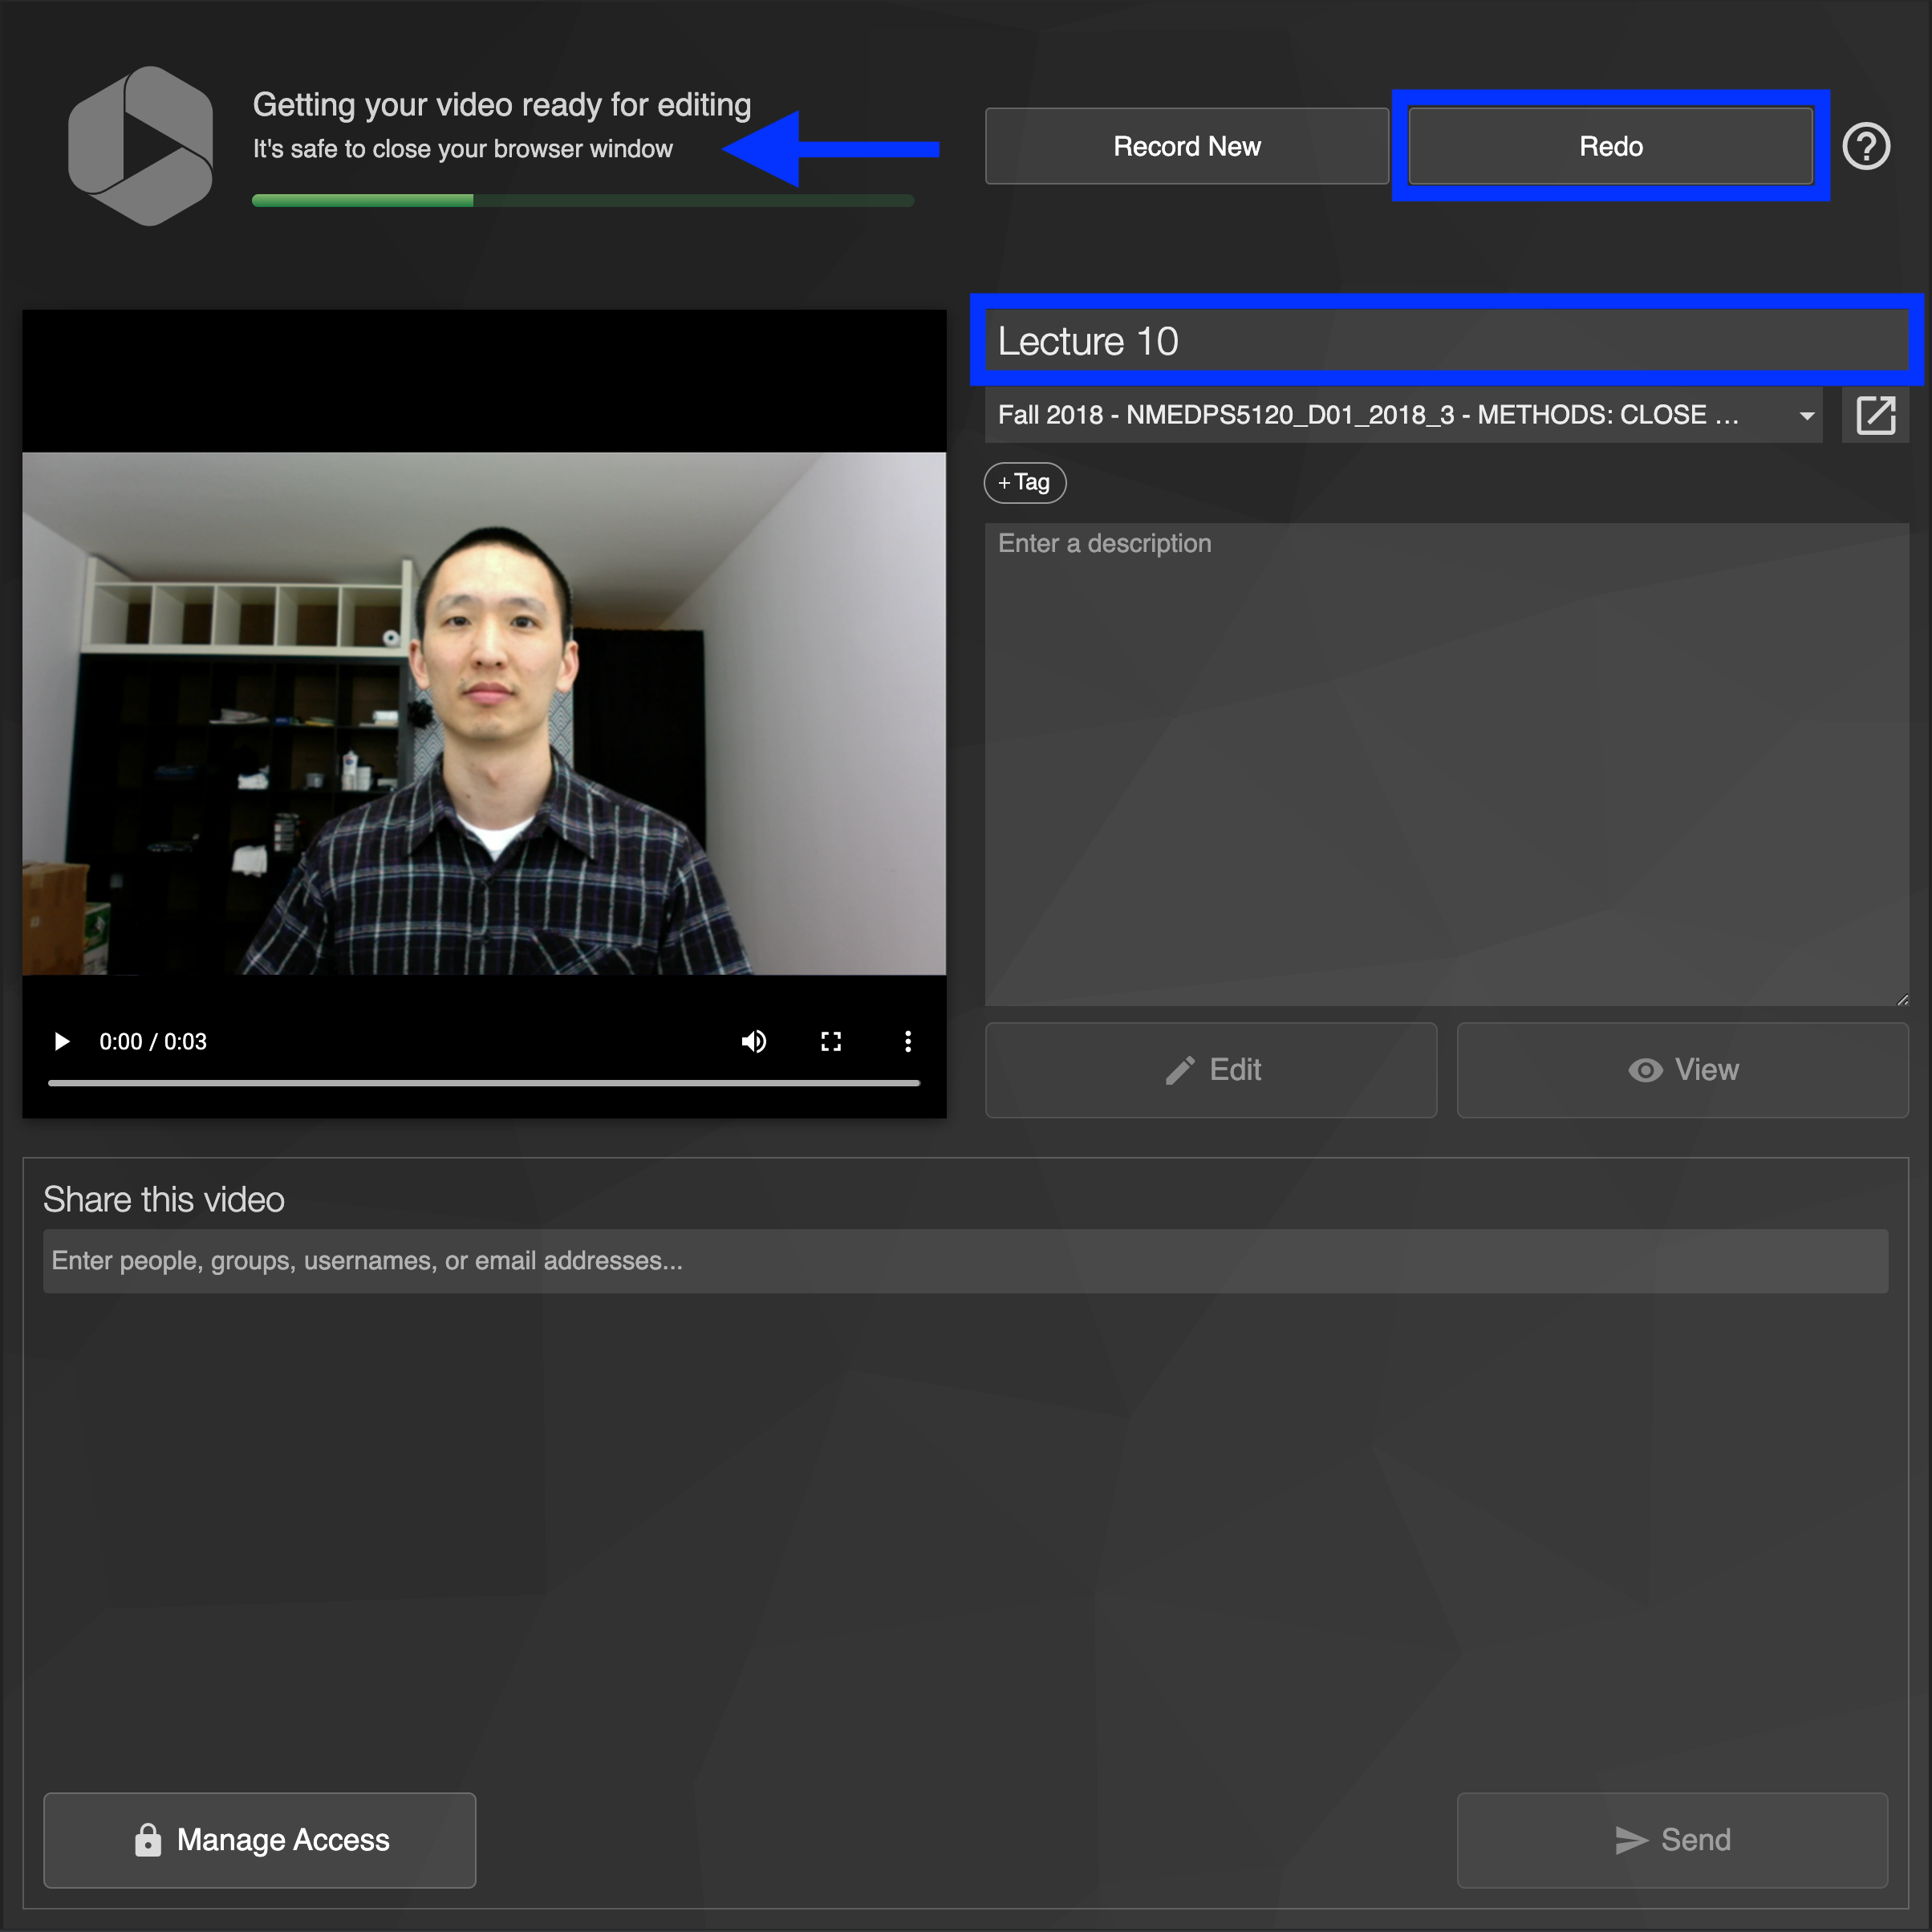
In the next screen, you can choose Redo if necessary. Otherwise, confirm the title and make sure you see It’s safe to close your browser window or Your video is ready in the upper-left corner before closing the web browser tab or window.
Step 7. Insert Your Session
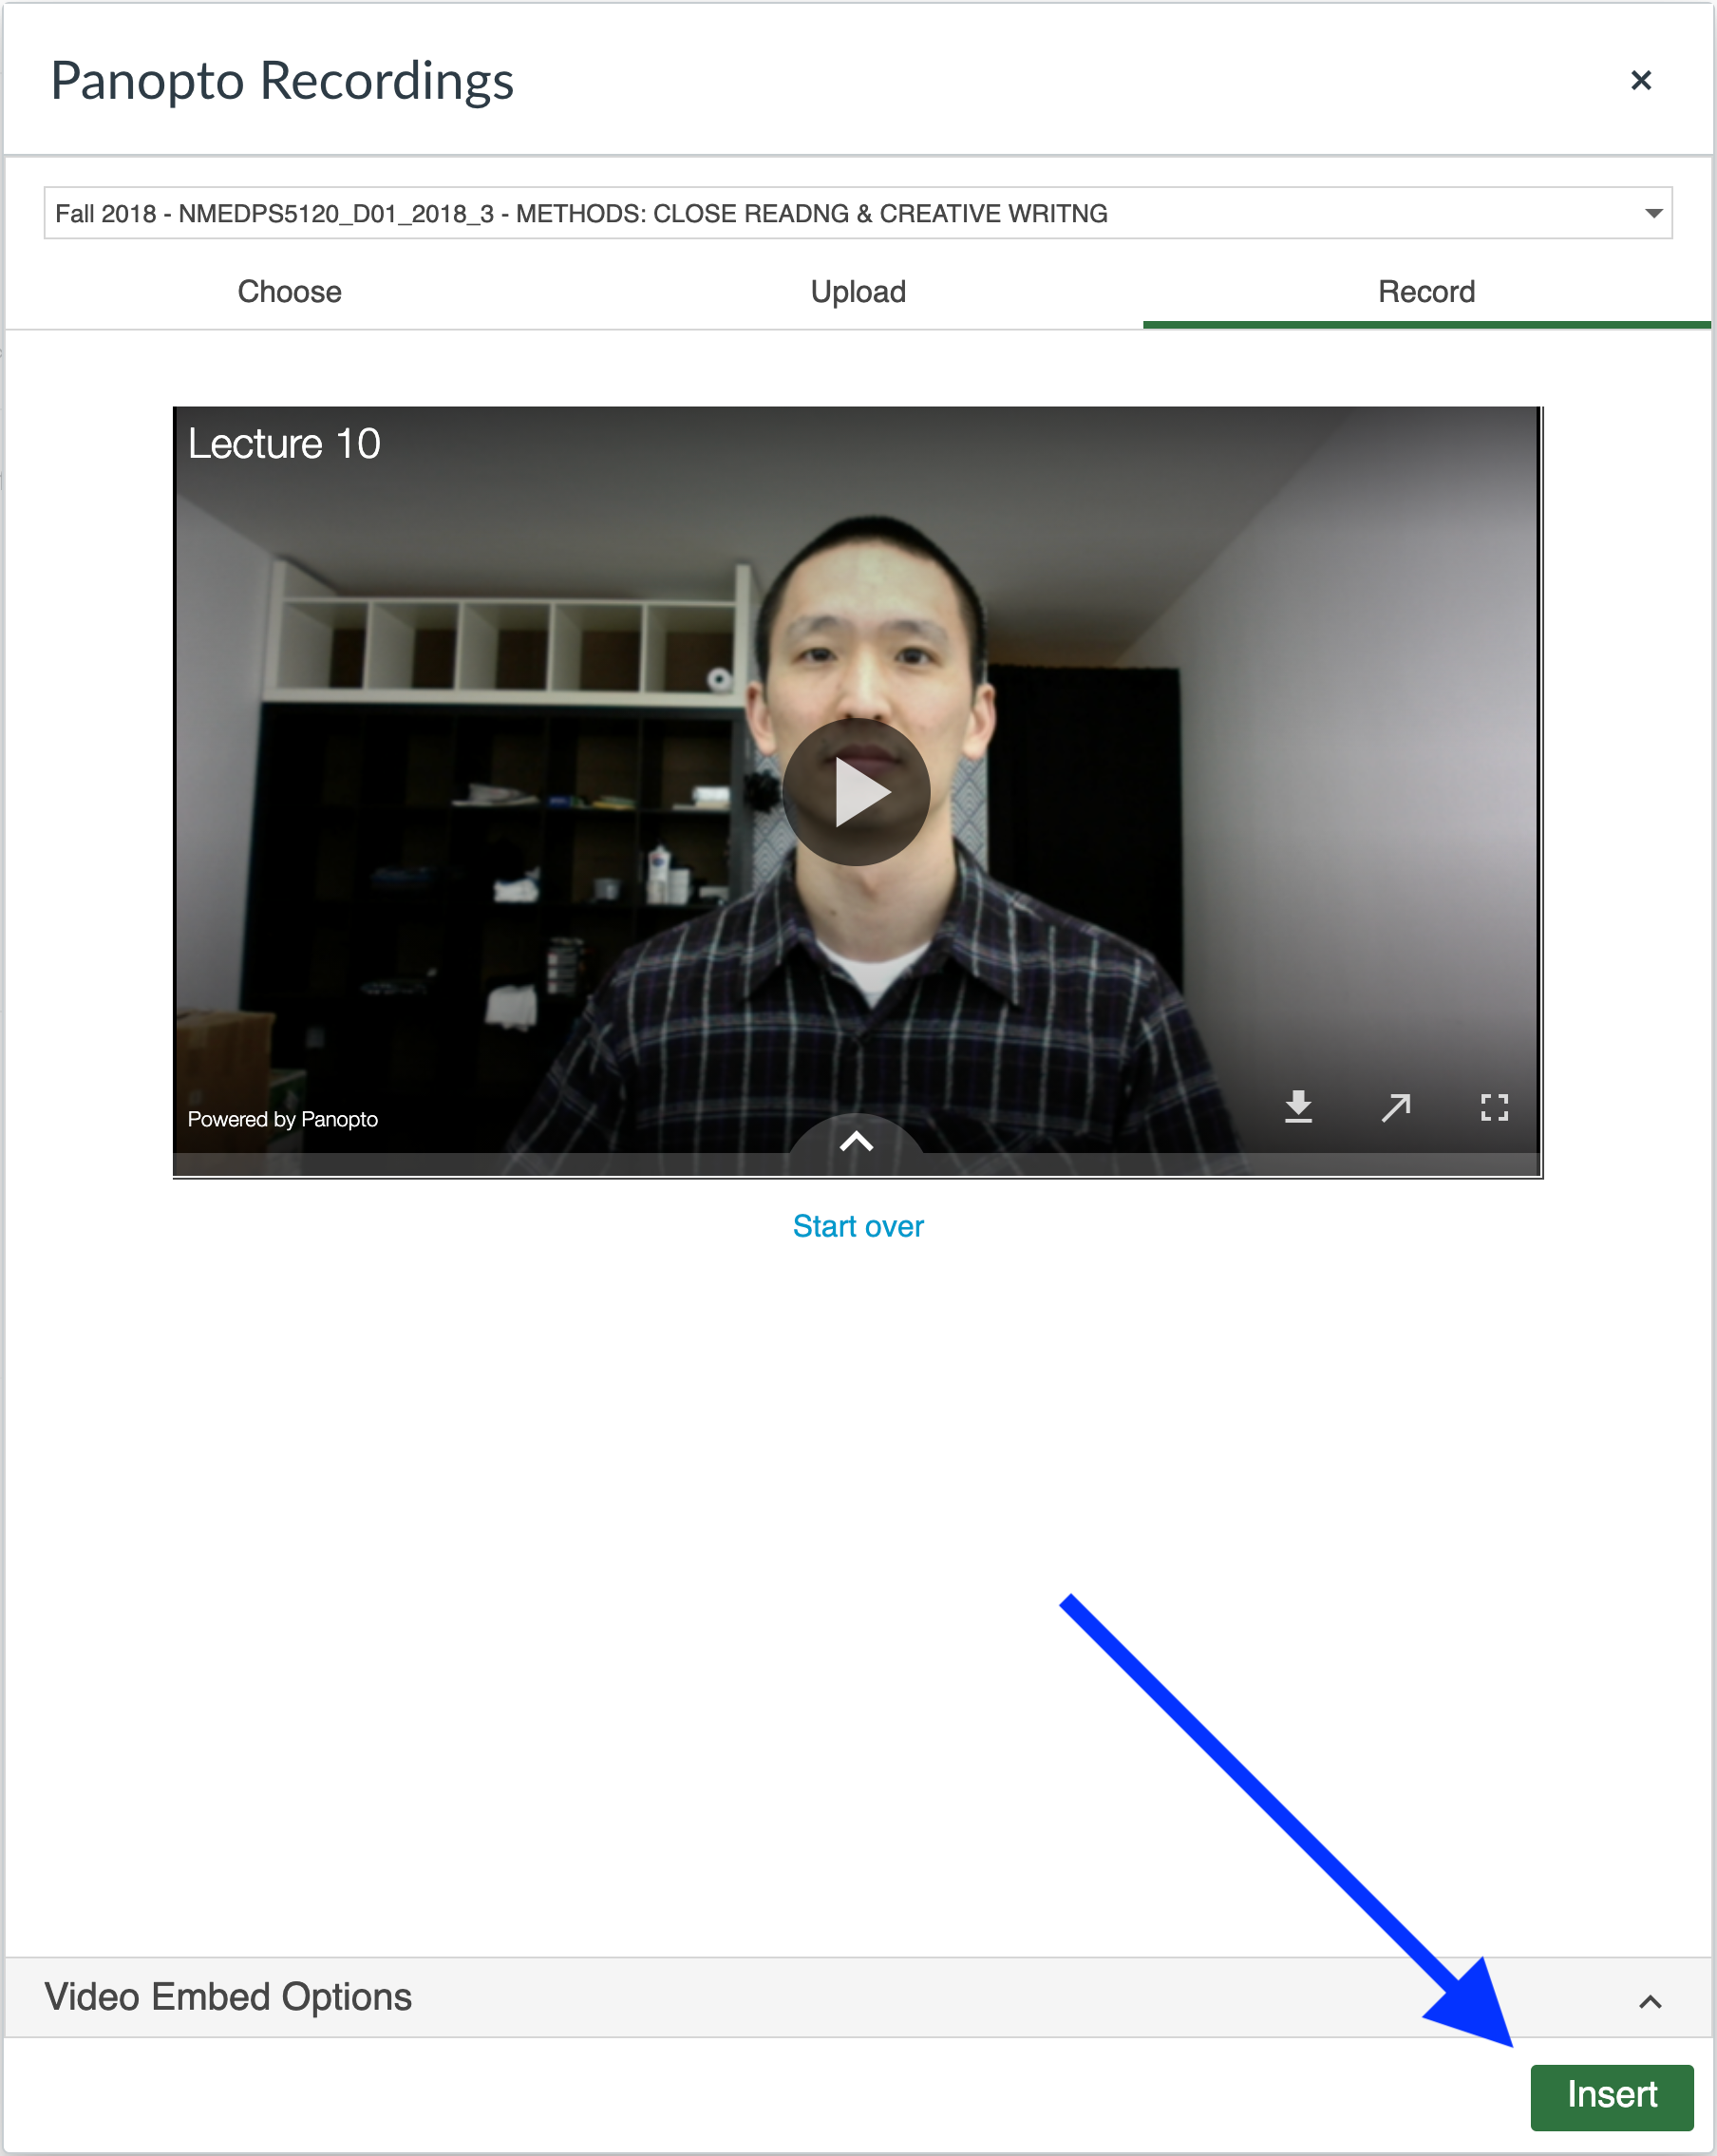
Return to your course page on Canvas showing the Panopto window, then click on Insert at the bottom-right. (You may have to wait a moment for this button to appear, and a preview of your recording may or may not appear.)
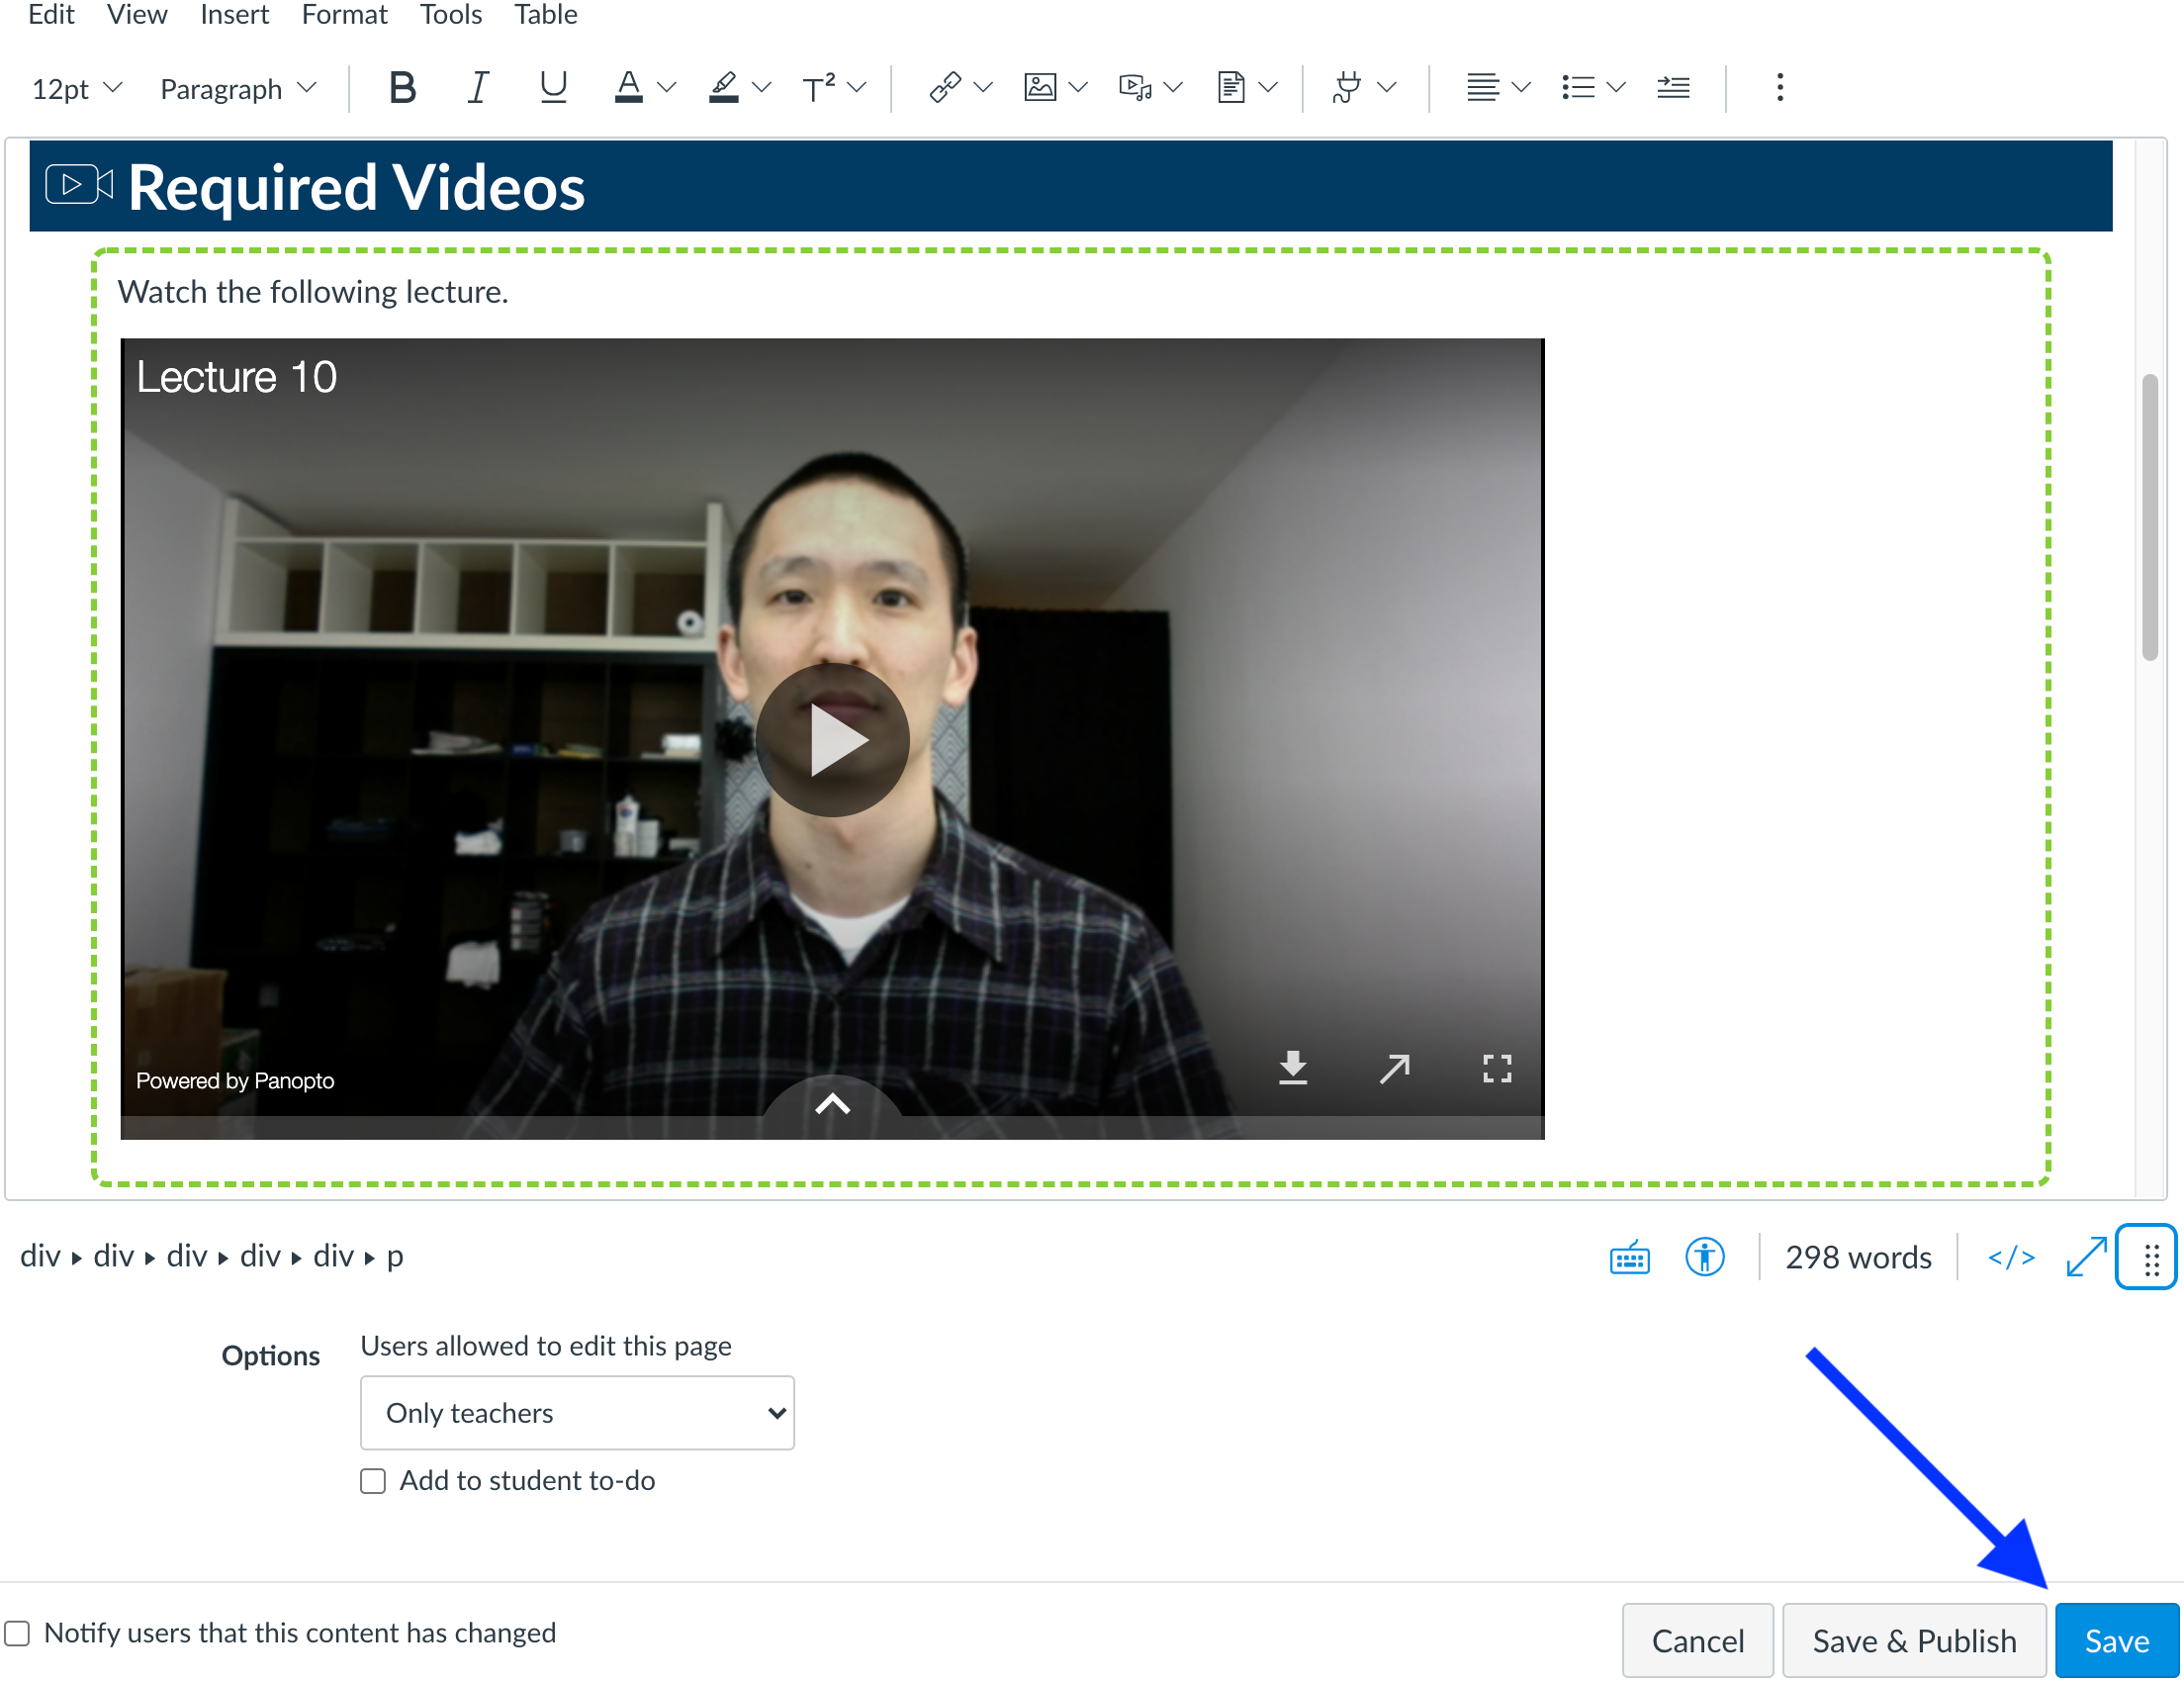
The Panopto window will close, and you will see your session appear in the text entry box. Click Save at the bottom-right of the page.
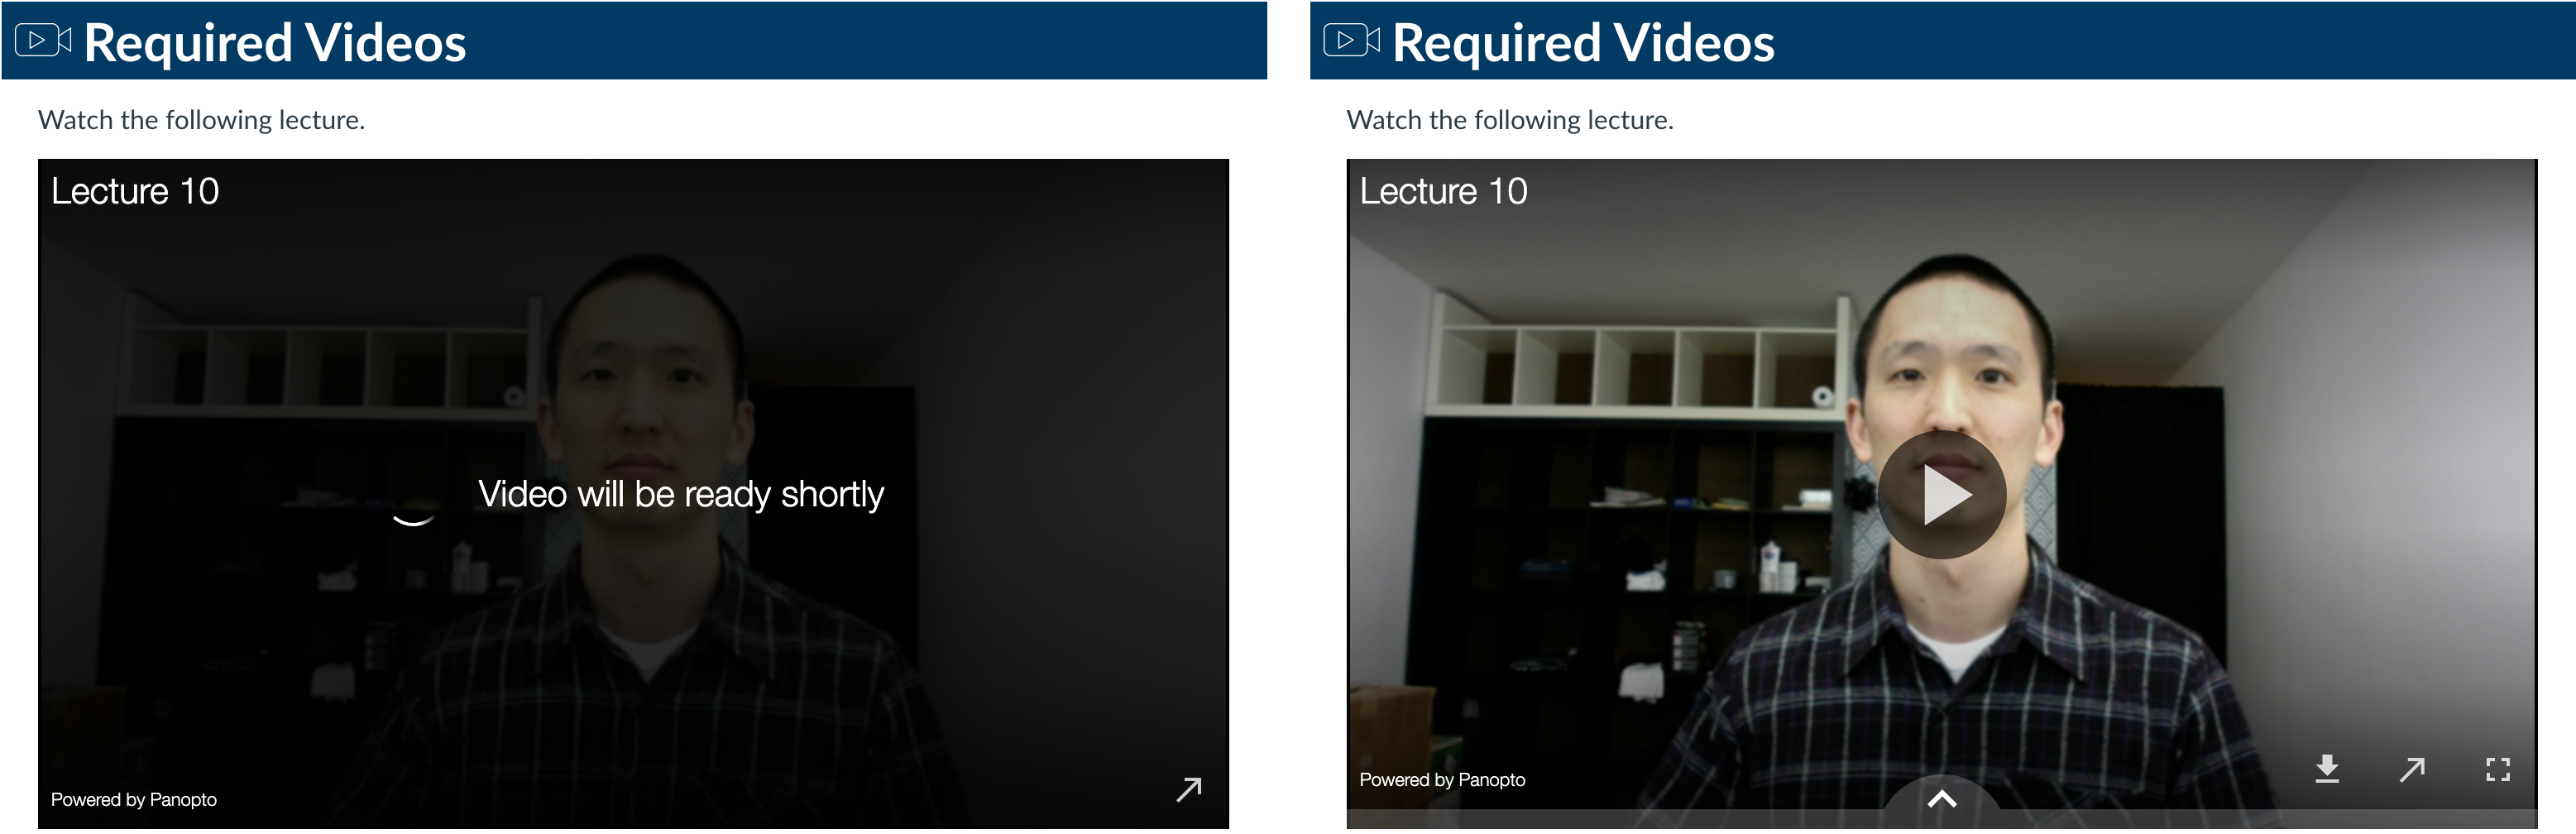
Your session will not be ready to watch until processing is complete. Processing time roughly corresponds to the recording’s length. When the Panopto session is finished processing, the embed will automatically refresh itself and be ready to play.